Creating the Ticket for a CUR backfill
1. Creating the Ticket for a CUR Backfill from nOps (up to 12 months)
For each Payer account, you can request a CUR backfill for up to 12 months directly from the nOps platform. This process is quick and automatically generates an AWS support ticket on your behalf—you’ll receive a confirmation email from AWS once the ticket is created. Please notify your nOps point of contact after submission if needed.
You must have a Business, Enterprise On-Ramp, or Enterprise Support plan to use the AWS Support API before creating a ticket from nOps.
If you don’t have one of these support plans, please follow the manual process described in the next section.
Steps to Request a CUR Backfill via nOps
-
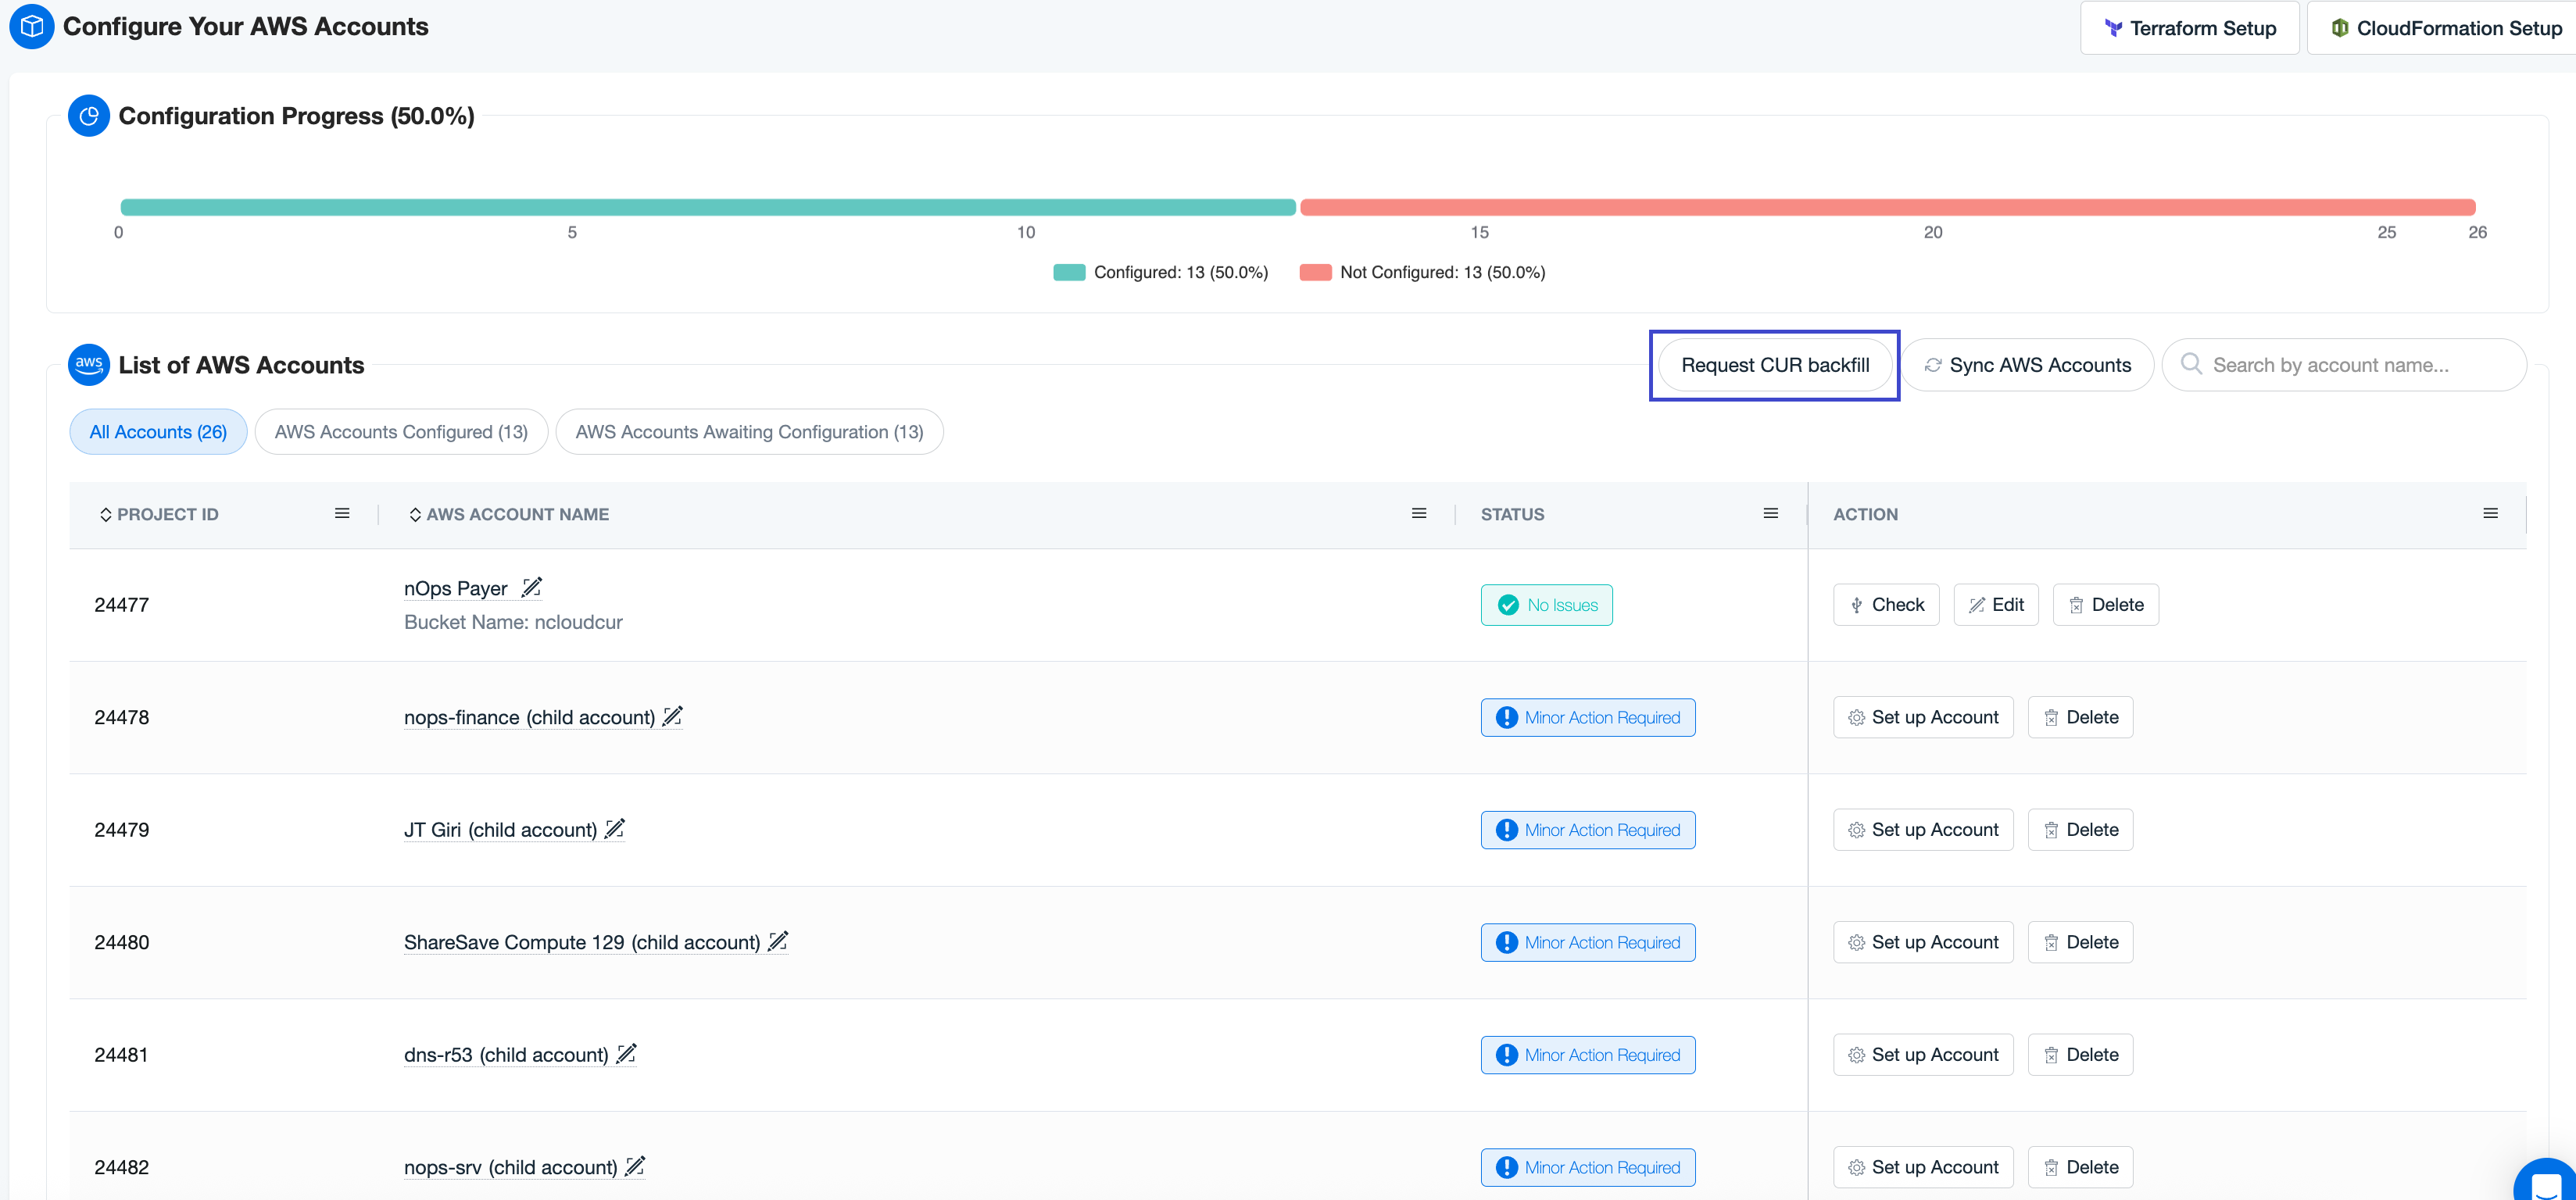
Navigate to Settings > AWS Accounts
-
Click on the Request CUR backfill button
-
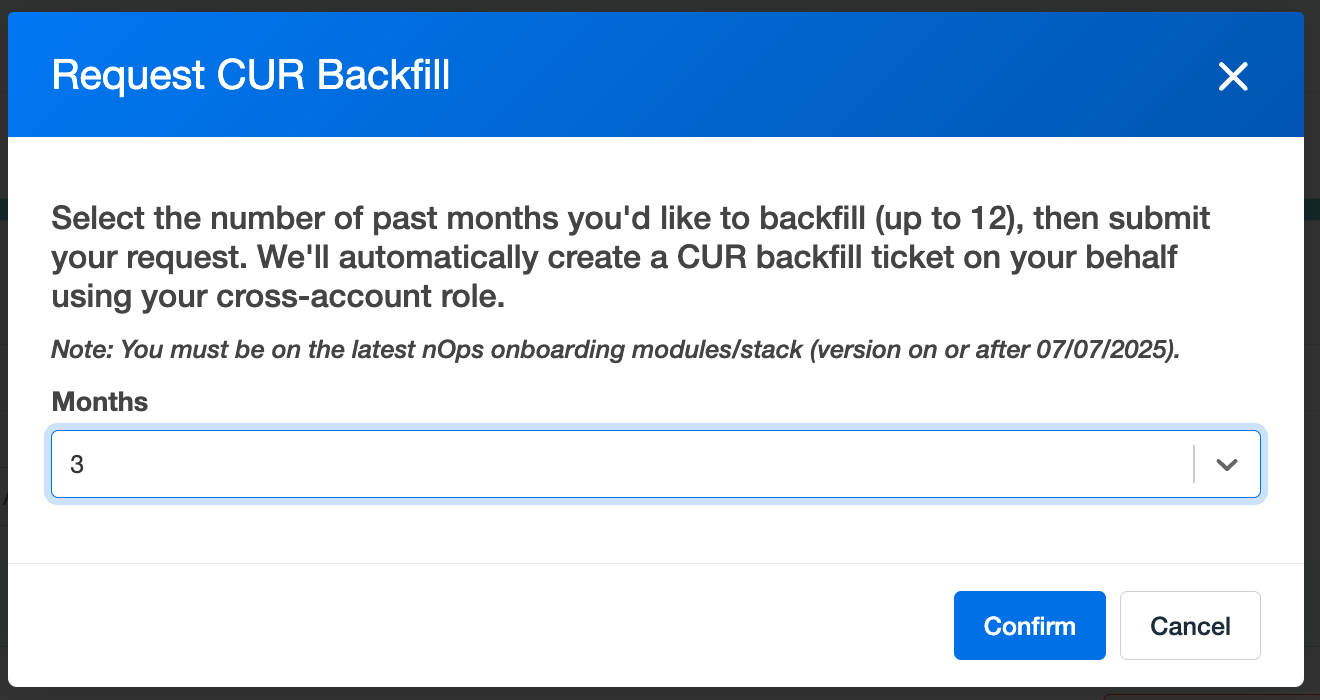
Select the number of months you'd like to backfill and confirm
-
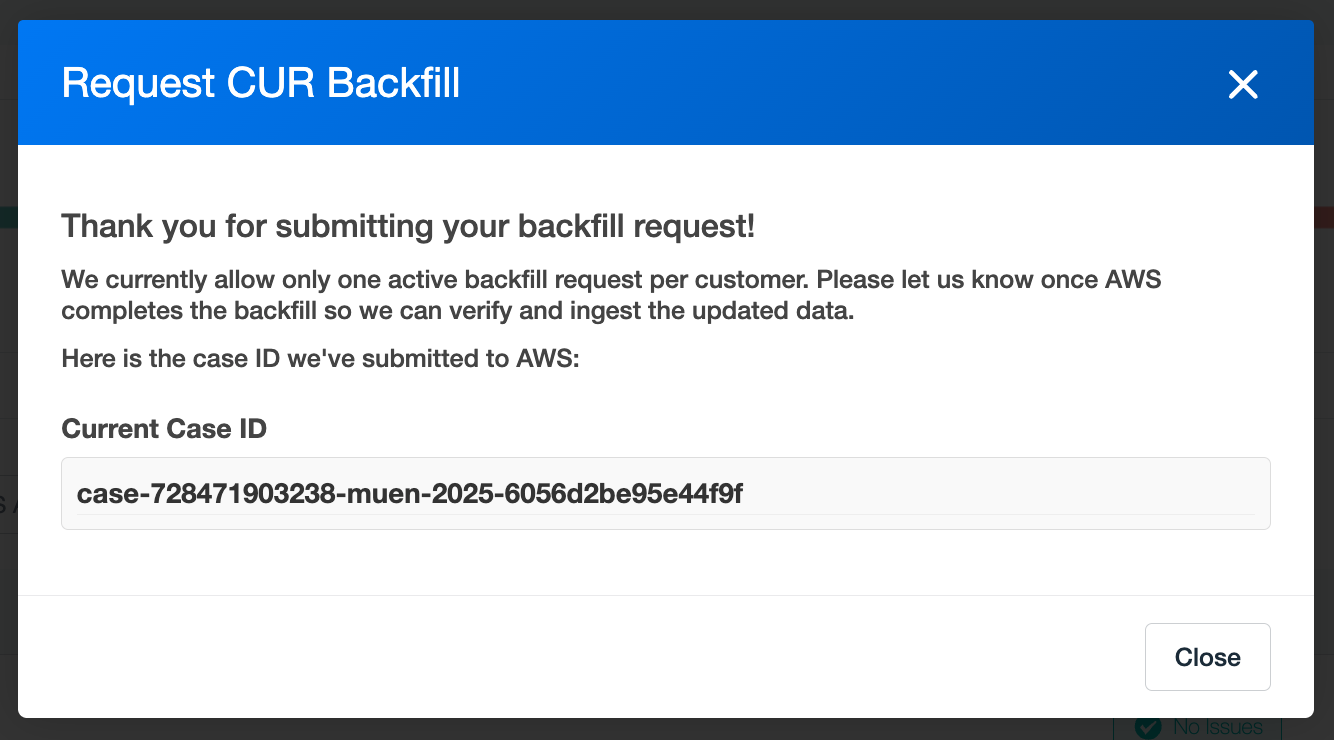
A confirmation message will be shown
If you need a backfill for more than 12 months, please follow the instructions in the next section.
2. Creating the Ticket for a CUR Backfill Manually (More than 12 Months)
For each Payer account, log into your Amazon Support Console and Create a Case to create a support ticket. Please CC your point of contact at nOps in your support ticket, or inform them when the backfill has been completed.
Ticket Information
-
Enter the following selections for your support case.
Item What to enter Related Issue Account and Billing Service Billing Category Consolidated Billing Questions Severity General question 
-
Click the Next step: Additional information button to the bottom right and enter the following:
Subject: CUR Backfill Request Description: Please Backfill our CUR for the following:
CUR Report name: nopsbilling-hourly-parquet
Time Period: <Month you want data backfilled from> to <the Month prior to the data in nOps>
Master Payer account: <your AWS master payer account number>
Type of CUR: Legacy CUR
Reason: We are leveraging a FinOps solution that requires all CURs to be in parquet format, and would like historical information for the dates listed to be backfilled. -
Click the Next step: Solve now or contact us button to the bottom right.
-
Change to the Contact us tab.
-
Select Web.
-
Click Submit.
After the process has completed, please confirm it's been completed with your nOps point of contact.
Need a MAP Backfill Instead?
If you're looking to backfill data specifically for the MAP, please follow the instructions on our MAP Backfill guide.