AWS Migration Assistance Program Tracker
If you’re participating in AWS’s Migration Assistance Program, you probably know that getting AWS credits for resources that you’ve migrated into AWS requires that you apply the right tags to those resources – and you want to apply those tags as early as possible in order to earn the credits as early as possible. nOps MAP feature helps track and calculate earned credit and growth, so you get the maximum credit from the MAP program.
These MAP features can aid you if you’re a new AWS customer, just starting out with AWS and migrating your workloads into the AWS cloud, or an existing AWS customer moving workloads from on-prem data centers or from other cloud providers.
And note that qualifying for the credit also requires an AWS Well Architected Framework Review, so that you get the most from your cloud deployment – and that review is also facilitated by nOps tools.
- AWS Migration Assistance Program Tracker
- Tagging for MAP Credits
- Managing Your Migration Projects
- Navigate and Track Your Incentive Credits
- Troubleshooting
Tagging for MAP Credits
In order to get your AWS MAP credits, all your resources must be tagged according to the MAP rules. If your resources are not tagged properly, you won’t get the credits – and credits will only accrue on spends that occur after the tags are applied. nOps helps you to list the resources migrating for your various workloads, identify those that have been tagged, and then track your AWS incentive credits over the course of your migration. And in so doing, you’ll be setting up all your workloads for the required Well Architected Review, which nOps can also help you conduct.
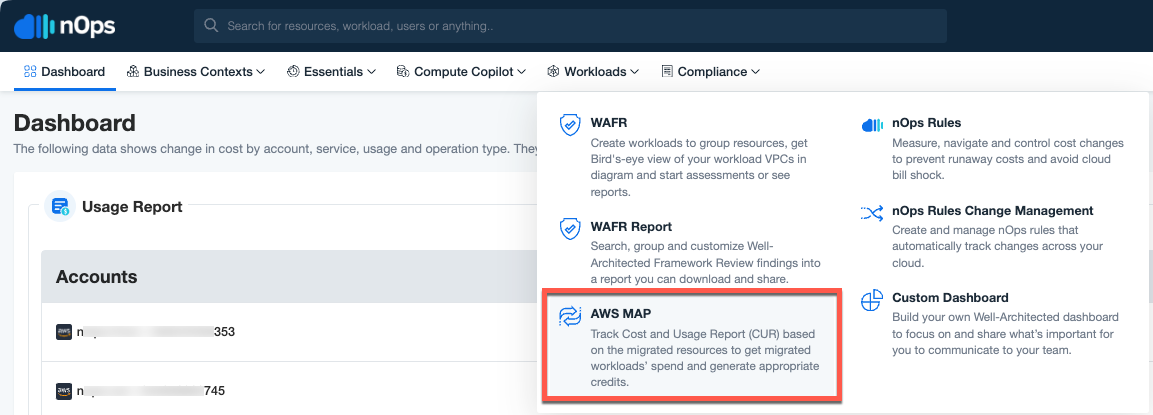
To use the nOps MAP functionality, from the nOps dashboard go to Workload > AWS MAP:
Defining Your Migration Projects
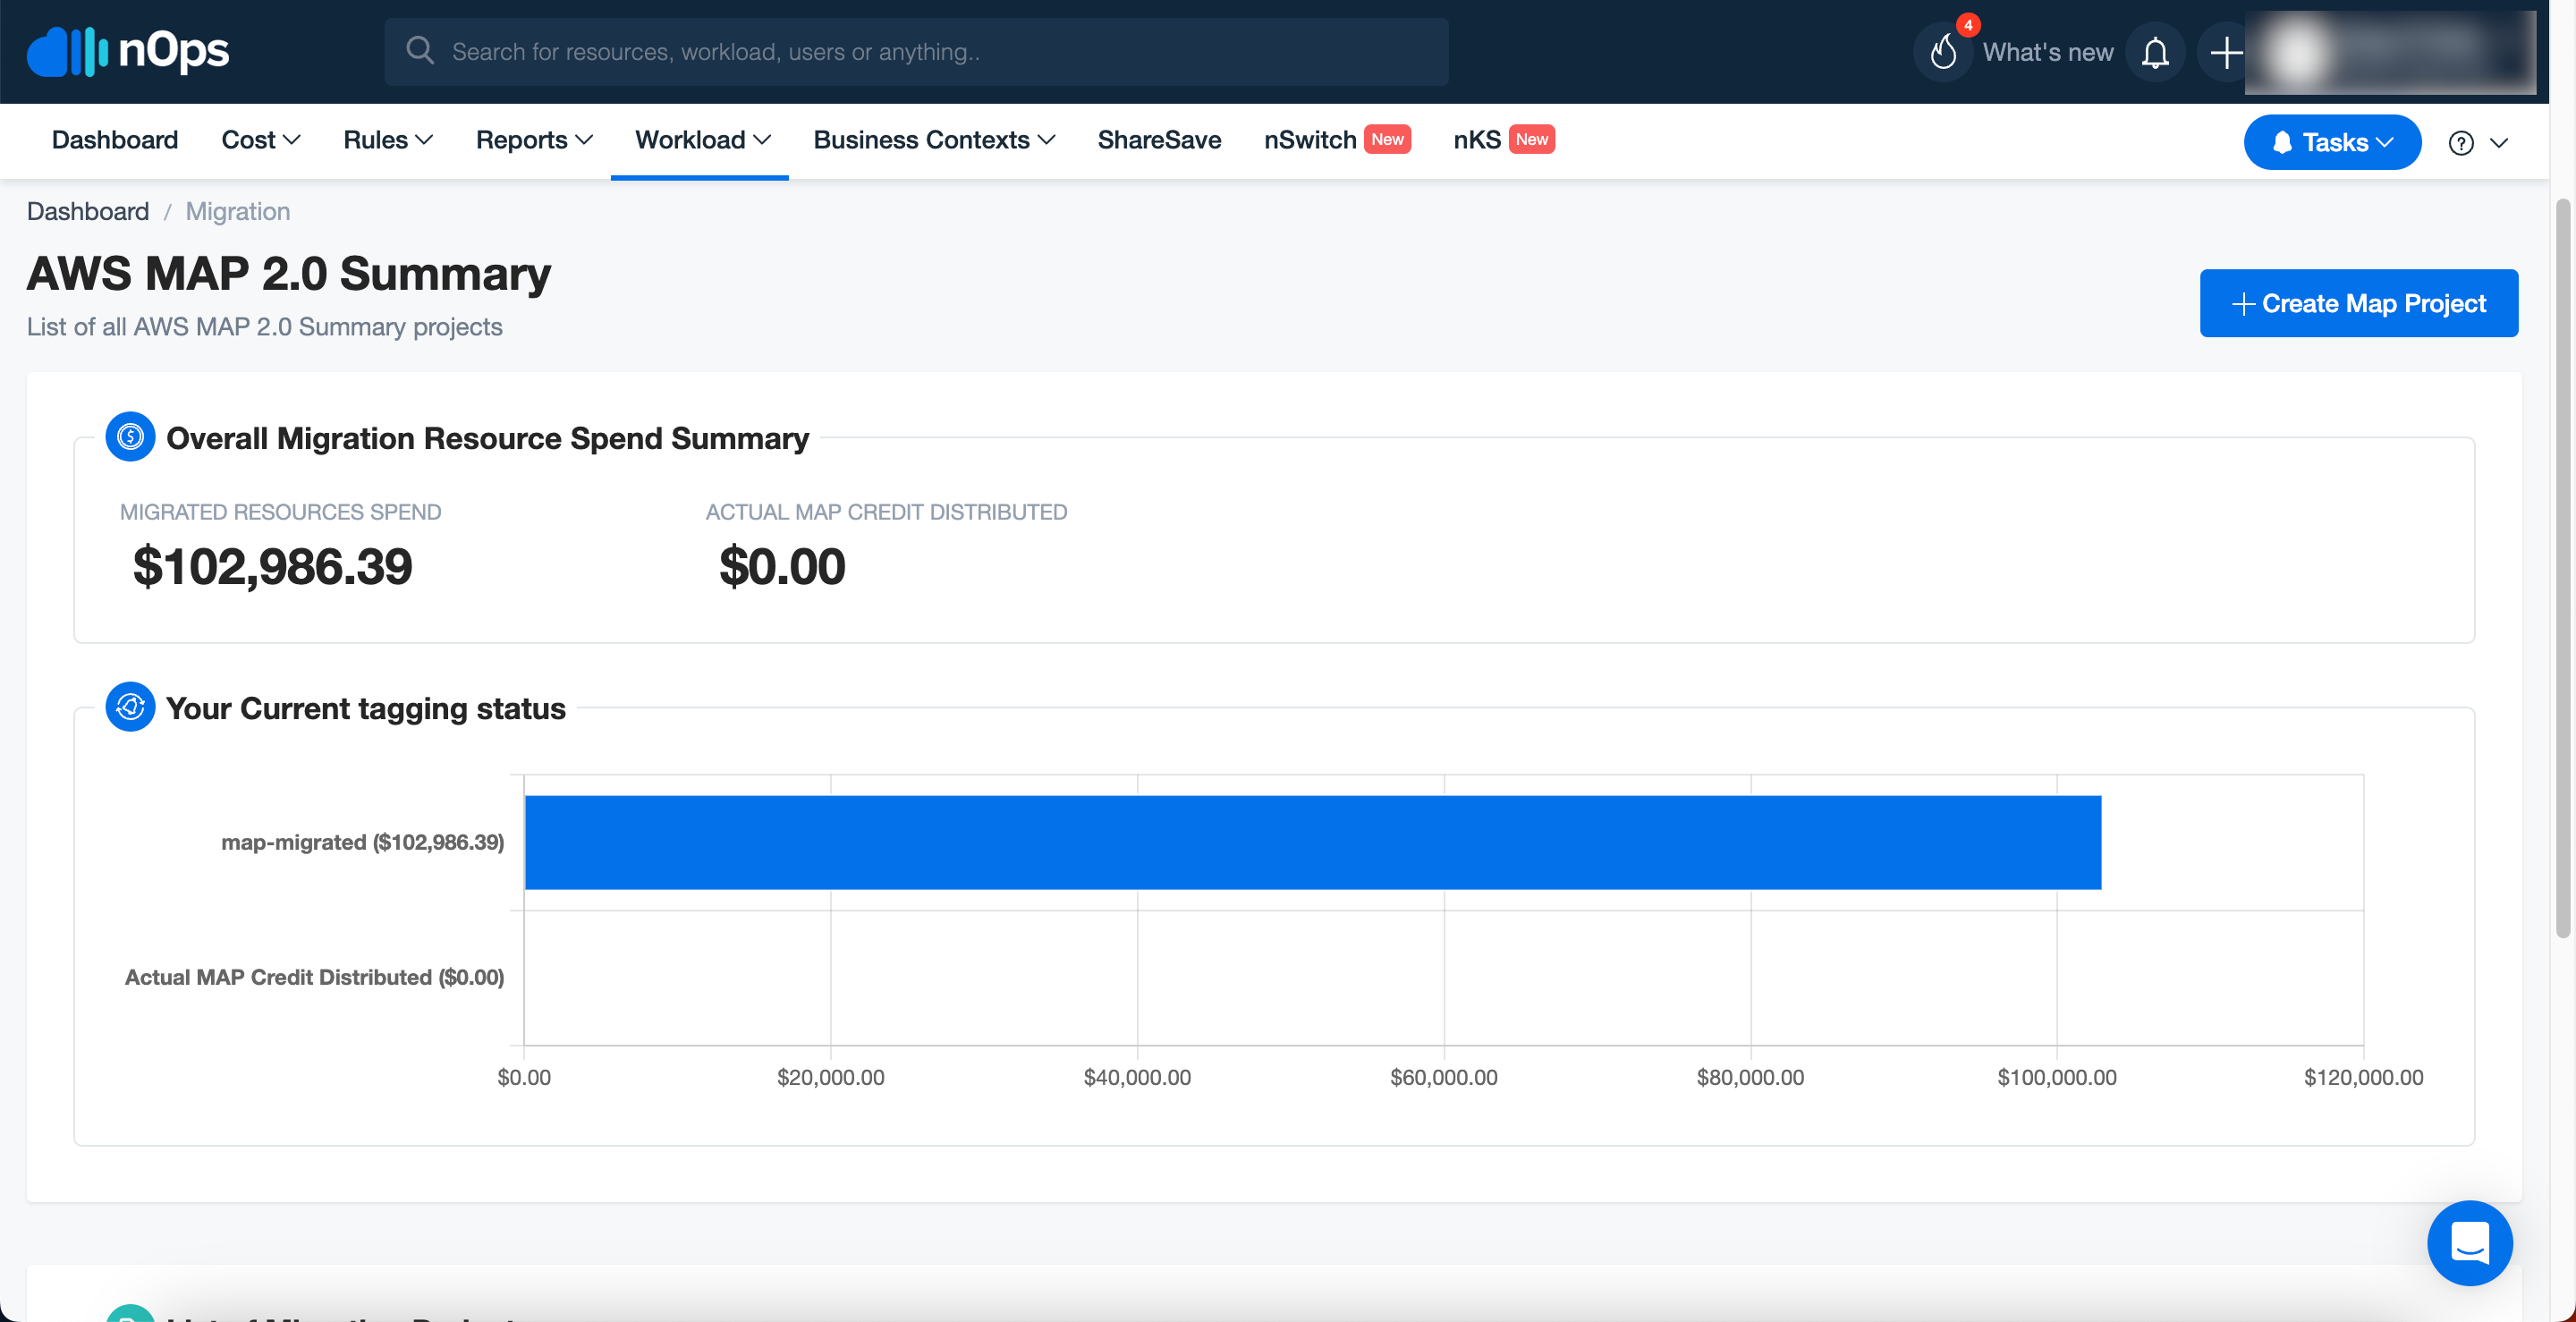
The nOps MAP feature starts with the page AWS MAP 2.0 Summary, where you’ll find three sections:
-
Overall Migration Resource Spend Summary – displays AWS on tagged MAP migrated resources and earned MAP credits.
-
Your Current Tagging Status – shows the $ amount of your migrated resources are tagged with map-migrated in order to get credits and actual credits distributed.
-
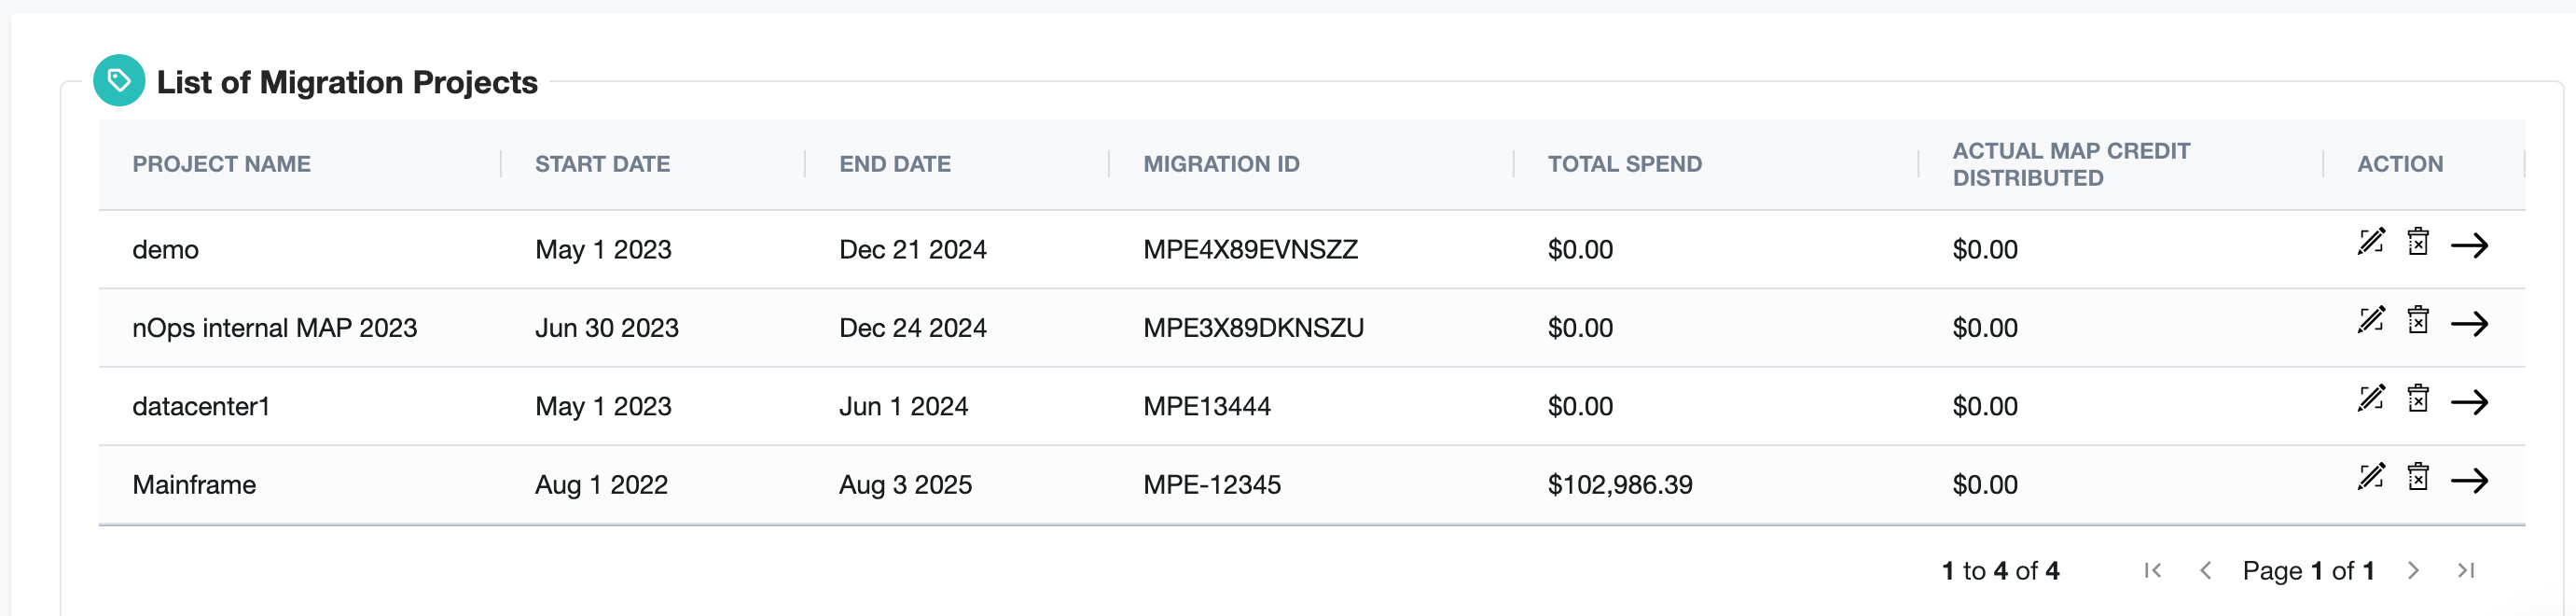
List of Migration Projects – shows projects that you’ve defined. Each project corresponds with a MAP Migration Contract from AWS and is identified by the project number in that contract, of the form MPExxxxx (where xxxxx are digits) or a 10-digit identifier such as ABCLMNOPYZ.
To create/add a MAP migration project in nOps, click + Create MAP Project at the upper right; it will bring up this dialog:
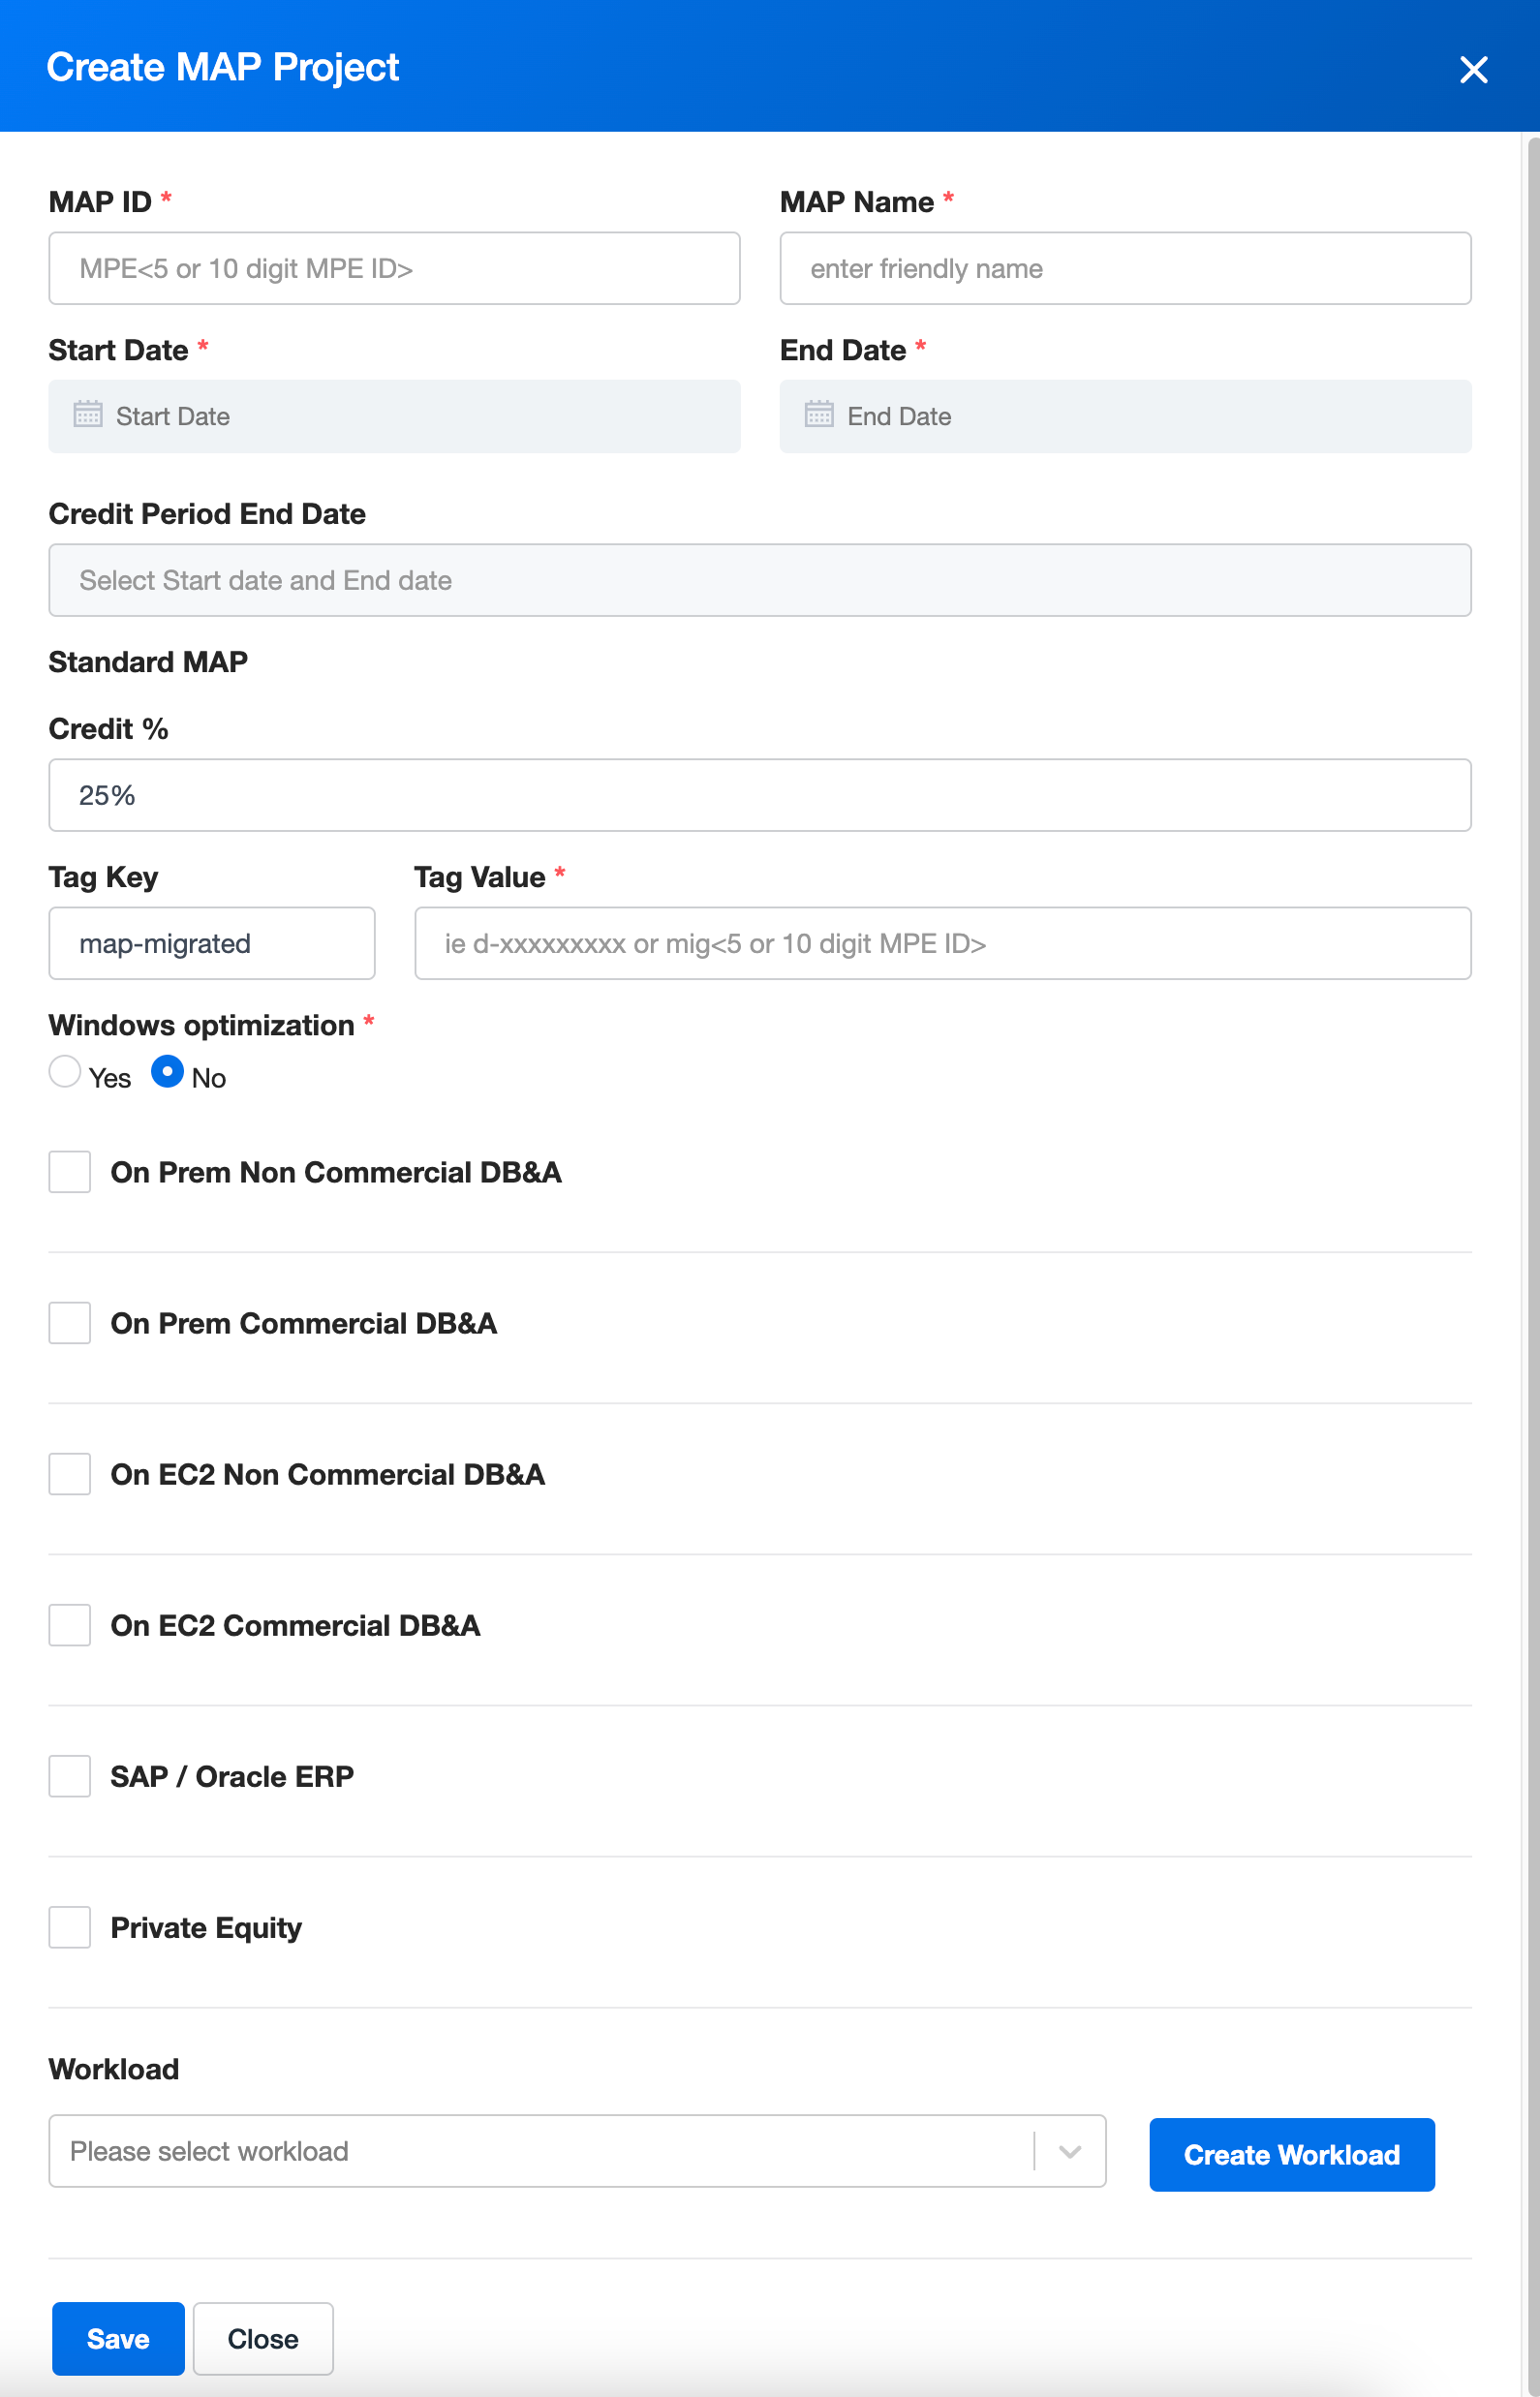
In the dialog, fill out the details:
-
MAP ID — The project ID starts with “MPE” followed by 5 digits or 10 digits (MPExxxxx, where xxxxx are digits), depending on your contract.
If you are not sure where to find your MAP Project ID, refer to the top of the first page of your MAP contract.
-
MAP NAME — Choose one that is meaningful to you.
-
Start Date and End Date — They should be per your MAP contract terms from AWS.
-
Credit % — Prefilled for you to the typical 25%, however you may edit this if your contract terms state a different discount for standard MAP resources.
-
Tag Value — Must be the exact value string from your AWS contract. This value should be mig followed by the 5 or 10-digit MAP ID. If it’s an older MAP contract, you may also use the server-id (typically d- followed by 9 digits).
-
Additional options — Select any options for additional MAP incentives specified in your contract, such as Windows optimization or Commercial DB&A
-
Workload (optional) — As identified in nOps’ Well Architected Framework Review facility. You can select an existing workload that you’ve created in nOps or you can create a new workload for the MAP project. To create a new workload, click Create Workload, this will take you to the Workloads page in nOps. With workloads, you have the option to define a scope for where nOps should look for tagged and untagged resources.
Once you’ve entered all the details for this MAP project, click Create. The project you just created will show up in the List of Migration Projects on the AWS MAP 2.0 Summary page. Every MAP project that you create this way in nOps will correspond to a MAP Migration Contract.
You can now click ➡️ in the Action column of the List of Migration Projects section for the project to see the cost, credit, and resource details.
Tagging Resources Within Each Project to Earn MAP Credits
nOps provides an easy automated way for you to tag any untagged resources.
Once your MAP migration projects are defined, each with its associated resources via the server ID, nOps will show you all the AWS resources associated with the servers you have identified for the migration projects. As more and more resources from the servers/storage units are added, you will periodically come back to nOps to tag all untagged resources.
To tag resources of a project:
-
Click ➡️ in the Action column of the List of Migration Projects section: This will take you to the Migration Details of the migration project.
-
Scroll down to the List of resources section. Each service category opens a list that contains all the resources associated with the migration project:
-
Select the resource(s) you want to tag, and click + Add Migration Tag and then click + Tag Now.
-
Click Yes in the prompt that pops up and follow the steps of Systems Manager to complete the tagging.
Managing Your Migration Projects
Once you’ve defined one or more migration projects in nOps, you will see each of those projects listed at the bottom of the AWS MAP 2.0 Summary page where you started:
You can access and manage any migration project by clicking the ➡️ button in the Action column of the List of Migration Projects section.
Navigate and Track Your Incentive Credits
In the AWS MAP 2.0 Summary page, again note the arrow at the right of each migration project line, in the Action column. Clicking that arrow brings up the details of that migration project.
The details page shows the performance of a specific migration project, and it is divided into four distinct sections. At the top of the details page you will see the Migration ID, Start Date, End Date, Tag Key, Tag Value, Credit Percentage, and Workload associated with the migration project you just clicked:

The next three sections are all about navigating your incentive credits, tracking your tagging status, and viewing tagged resources:
-
MAP Tracker
-
Your Current Tagging Status
-
List of Resources
MAP Tracker
MAP Tracker offers a way for you to find the scope of your project and navigate your incentive credits over the entire period of your migration, with the help of:
-
MAP Spend: Total Spend/Cost excluding CUR line-item types Tax, Credit, and Refunds.
-
Trailing Twelve Month (TTM) MAP Spend: Sum of MAP spend in the existing quarter and the previous three quarters.
-
General Spend Growth: Refer to the MAP Credit Calculations section of your AWS MAP plan.
-
Estimated MAP Incentives: Estimated credits that you have earned from AWS with the MAP plan.
-
Actual MAP Credits Disbursed: Credits that you have received from AWS. You only receive your earned credits in the month after a quarter ends.
Current Tagging Status
This section is similar to the Current Tagging Status of the AWS MAP 2.0 Summary page_,_ which summarizes the tagging status of all your migration projects.
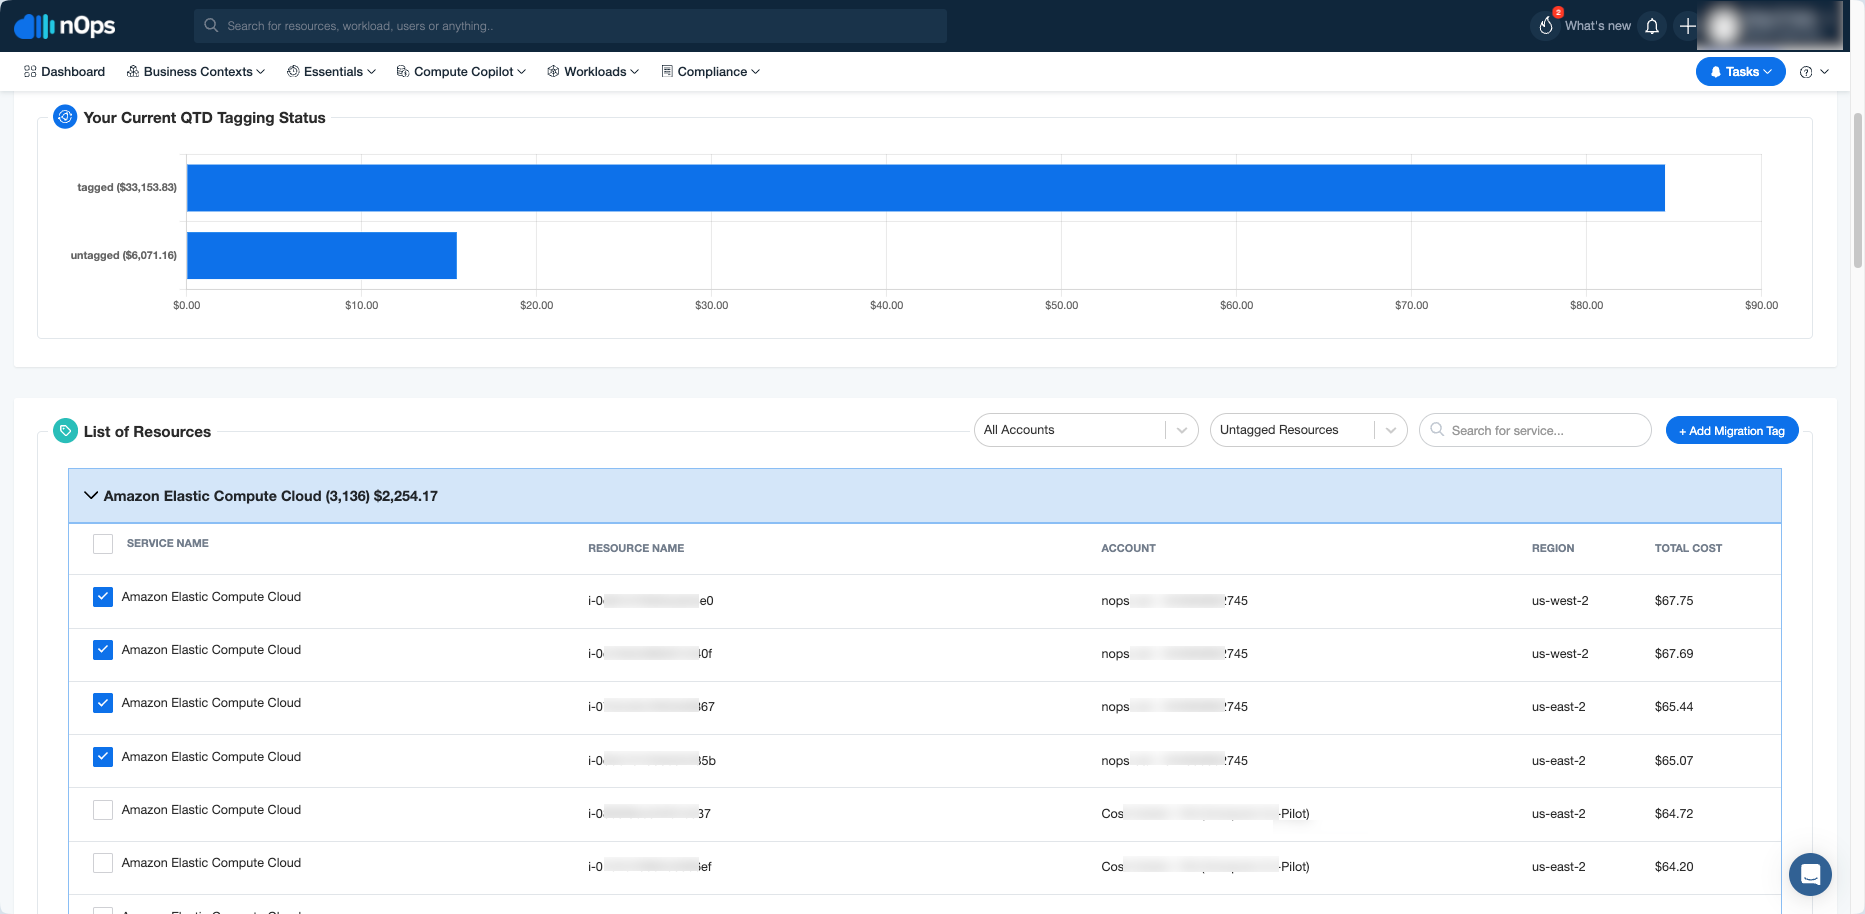
The Current Tagging Status on this details page shows the tagging status for only this specific migration project. It shows a bar chart for how much of your spending has been credited against tagged resources, and how much remains against untagged resources, in the current QTD, for this specific migration project.
List of Resources
This section shows all the resources, tagged or untagged, within the migration project. You can filter the resources based on the account associated with the resource and the tagging status (tagged, untagged) of the resource. You also have the option to search any specific service with the help of the search box at the top right of the list.
To tag untagged resources, select the untagged resources and click the + Add Migration Tag button as described above.
The resource table gives:
-
Service Name — AWS service that contains the resources.
-
Resource Name — Resource associated with the AWS service.
-
Account — The AWS account associated with the resource.
-
Region — Region of the resource.
-
Total Cost — The total cost of the resource.
The resource table will update periodically as more resources are added. Continue visiting the List of Resources section to tag all newly added untagged resources for the duration of the migration project.
Troubleshooting
Matching Spend and Credit Numbers with AWS
What to do if the numbers in nOps don’t match what shows in AWS:
- Ensure the map-migrated key is set as an active Cost Allocation tag
- Check dates of tagging vs Amazon
- Use the nOps view by tag feature in Cost Analysis to see if the tag was applied at all
AWS Logins for Generating Server ID and for Tagging Resources
What to do if you don’t have the permissions to tag your migration project resources:
-
Ask your AWS admin to grant you permissions.
-
Check if you have the permissions for the resource that you are trying to tag.