Installing the Datadog Agent for Enhanced Rightsizing Recommendation on the nOps Platform
When aiming to install the Datadog agent, it’s important to note two scenarios: if a new Auto Scaling Group (ASG) template is required, begin from Step 1. If an ASG template already exists, directly proceed by copying the User Data Script for Datadog from Step 2, replacing DD_API_KEY with your actual key, and pasting it into your template.
Step 1: Create or Update an EC2 Launch Template for Datadog Agent
-
EC2 Dashboard: Go to “Services” and click on “EC2”.
- Launch Templates: Under “Instances”, click “Create launch template”.\
- Update Launch Template: Select “Launch Template” and from the action menu click “Modify template (Create new version)”

-
Template Details: Provide a name and description, select an AMI if needed, and choose an instance type.
-
IAM Role: Choose the created IAM role in “IAM instance profile”.
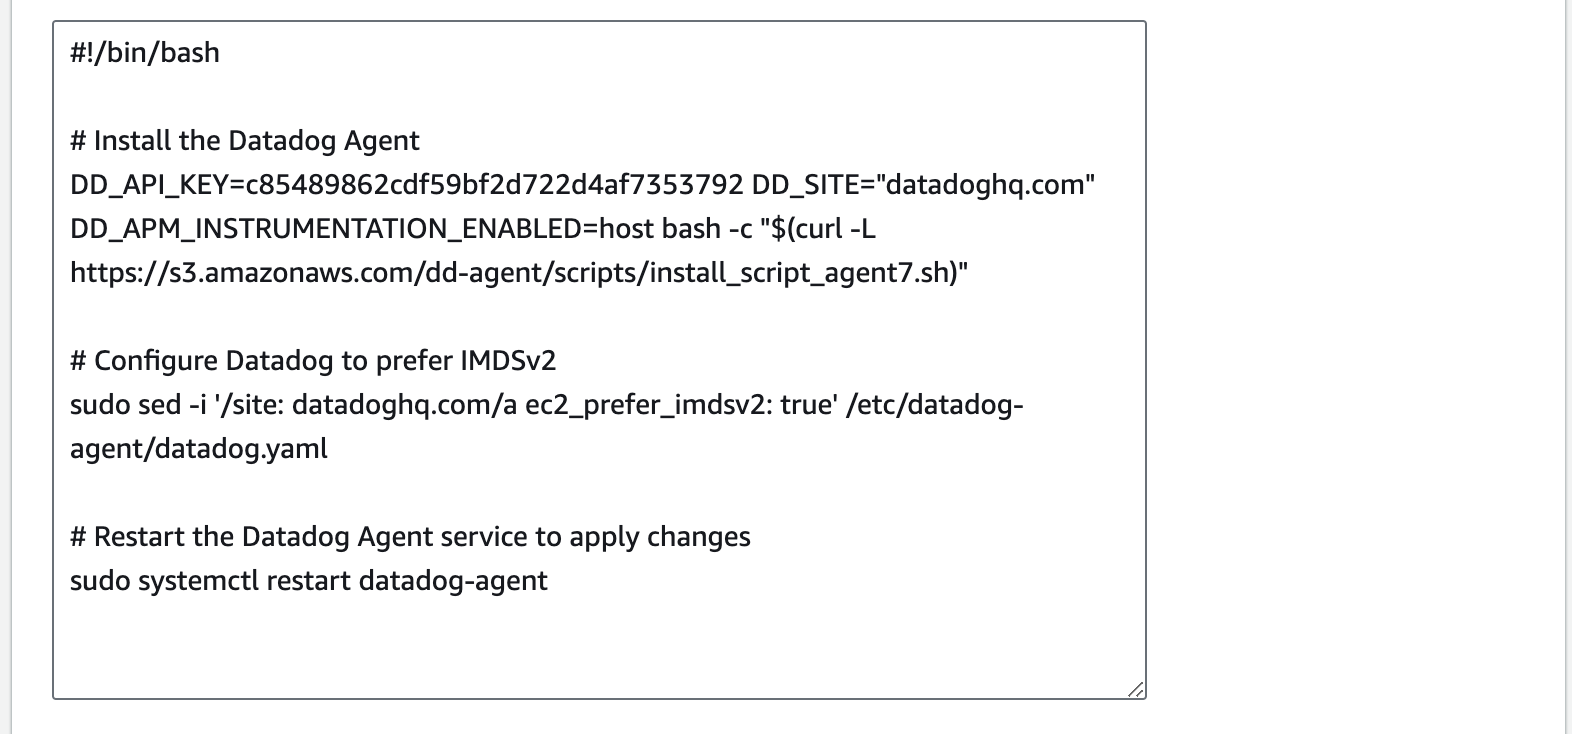
Step 2: In “Advanced details”, add the script to install the Datadog Agent agent:
- User Data For Datadog Agent Installation:
#!/bin/bash
# Install the Datadog Agent
DD_API_KEY=xxxxxxxxxxxxxxxxxxxx353792 DD_SITE=”datadoghq.com” DD_APM_INSTRUMENTATION_ENABLED=host bash -c “$(curl -L https://s3.amazonaws.com/dd-agent/scripts/install_script_agent7.sh)”
# Configure Datadog to prefer IMDSv2
sudo sed -i ‘/site: datadoghq.com/a ec2_prefer_imdsv2: true’ /etc/datadog-agent/datadog.yaml
# Restart the Datadog Agent service to apply changes
sudo systemctl restart datadog-agent
Save Launch Template: Review settings and “Create launch template”.
Final Steps:
After updating the ASG with the new launch template, any new instances launched by the ASG will have the chosen agent installed and configured. This setup enhances monitoring capabilities for these instances, allowing for better insights and optimization recommendations through nOps Rightsizing.