Steps to configure Onelogin SSO integration with nOps :
- Prerequisites:
-
You must be logged in to your nOps and OneLogin portal.
-
You must have administrator rights in nOps to configure SSO (Single Sign-On).
-
For a smoother SSO setup, we advise opening two browser tabs. In one, log into your nOps account, and in the other, log into your OneLogin account. Copy required information between the tabs to synchronize data and enable SSO access via OneLogin.
Step 1: Enable SSO and choose OneLogin
Log in to nOps as an Admin user. Navigate to Settings, click on SSO in the left panel, then click on the Enable SSO toggle, and select OneLogin as the SSO type.

Step 2: Sign in to OneLogin and set up nOps
-
Open a new browser tab and log in to OneLogin.
-
Go to the Applications page and click Add App.
-
Search for SAML Custom Connector 2.0 (advanced) to find the SAML 2.0 connector and click the icon.
-
In the Add SAML 1.1 Test Connector dialog, customize the Display Name, add an icon, and provide a description. Make sure the Visible in portal toggle is enabled.
-
Click save. Once saved, new tabs will appear in the left pane.
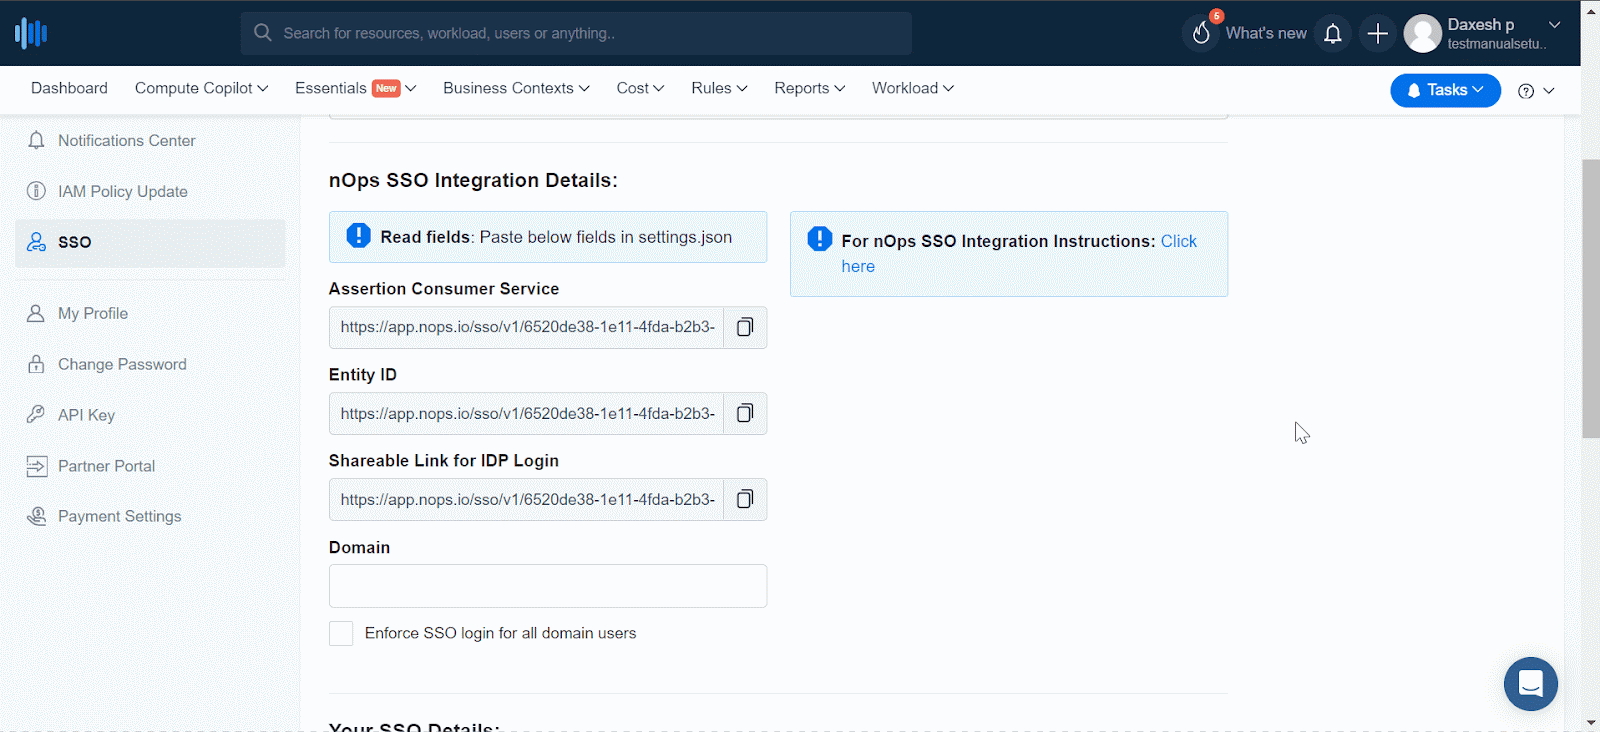
Step 3: Go to the SSO tab from the left panel to copy the configuration details from OneLogin to nOps
| From OneLogin | To nOps |
| Issuer URL (entityId) | Issuer URL (entityId) |
| SAML 2.0 Endpoint (HTTP) | SAML 2.0 Endpoint (HTTP) |
| X.509 Certificate | X.509 Certificate |

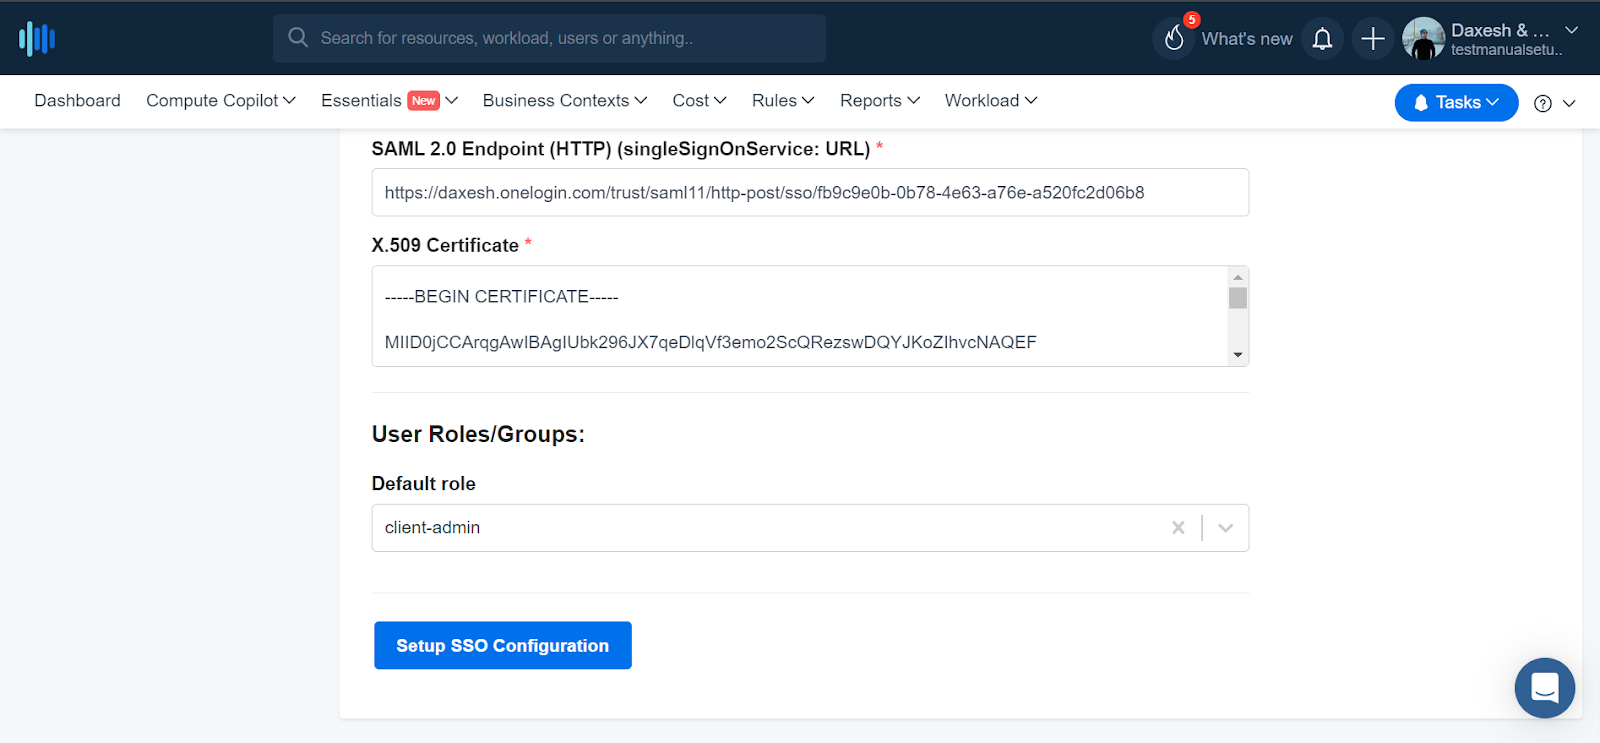
Step 4: Set up OneLogin configurations from nOps
- Click on the Save button at the top right corner after you finish
| From nOps | To OneLogin |
| Entity Id | Audience |
| AssertionConsumerService | Recipient, ACS (Consumer) URL*, ACS (Consumer) URL Validator* |
- On the nOps platform, select the default role for the users and click on Setup SSO Configuration.
Step 5: Adding Parameters on OneLogin
Add parameters to OneLogin so that you can sync the user names and other attributes between the two applications.
Click on Save once you have added all parameters.
| Field Name | Value | Include in SAML |
| User.email | ✅ | |
| User.FirstName | First Name | ✅ |
| User.LastName | Last Name | ✅ |

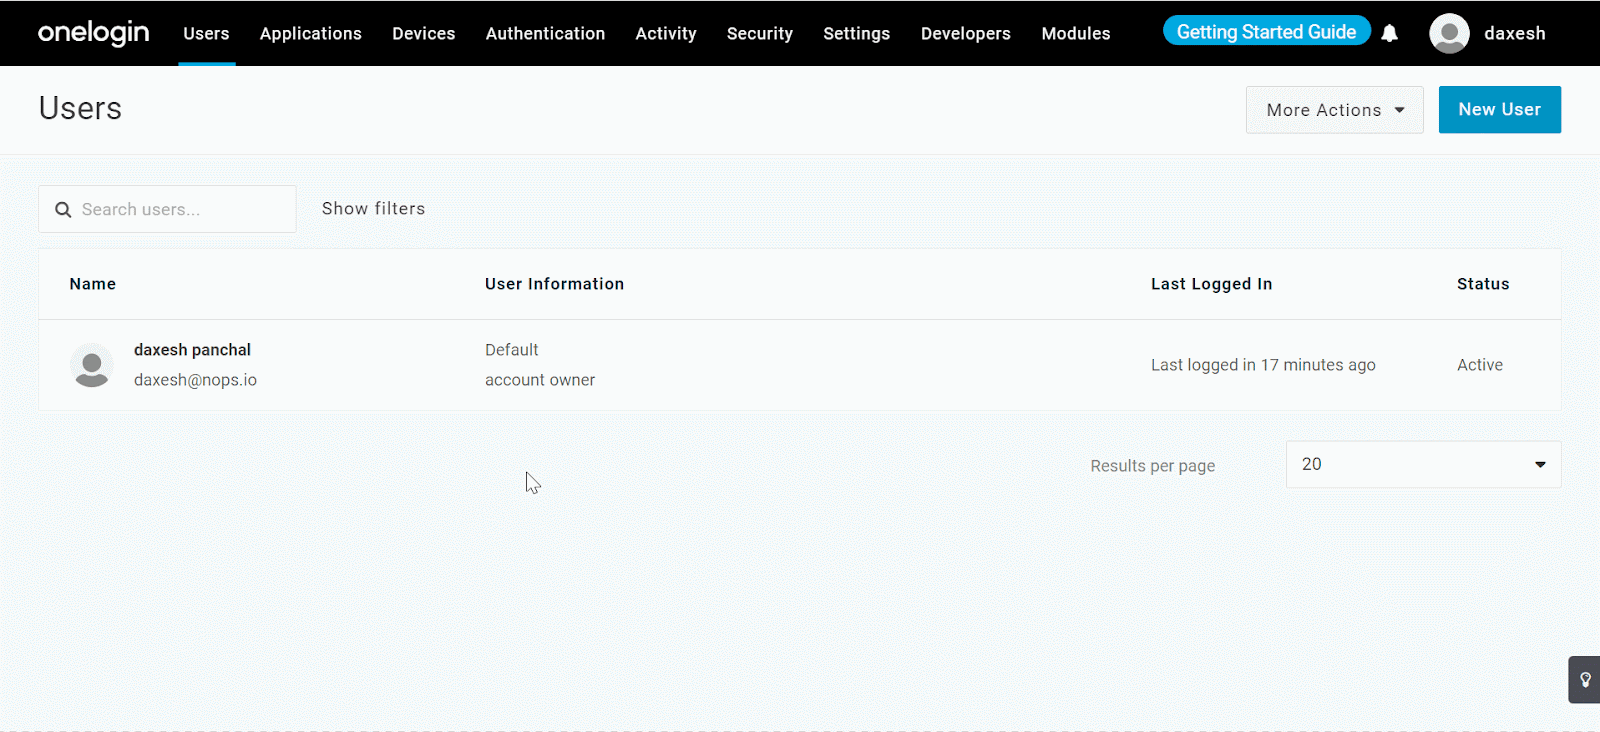
Step 6: Adding Users on OneLogin
-
From the OneLogin app click the Users tab from the top toolbar.
-
Click New User.
-
Turn the Active toggle on if not.
-
Enter information about the user for the following fields: First Name, Last Name, Email, and Username.
-
Click Save User.
-
Navigate to the Application tab in the left panel and in the Application field click the + (plus) icon
-
Add the SAML 2.0 application you created (nOps SSO) earlier to grant access for this user.
-
Click on the More Actions dropdown and select Send Invitation. The user must receive the confirmation email from OneLogin, click the link to confirm, and to set a password.
-
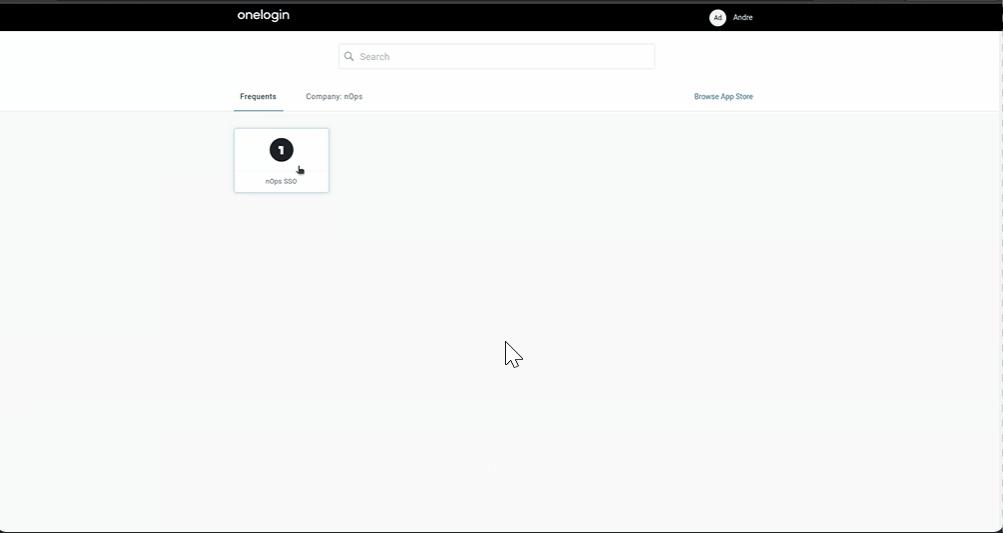
Later when logging into OneLogin they will see the SAML 2.0 app (nOps SSO).
-
Clicking on the app directs the user to nOps which will trigger an email being sent that requires that the user confirms the email.
-
Once the confirmation is finished, the user is able to log into nOps.


Invitation email from OneLogin

nOps email requiring confirmation user SSO login