Introduction
What is Essentials Storage for EBS volume migration GP2 to GP3 type?
The nOps Essentials module allows you to automatically migrate candidate volumes from gp2 to gp3 volumes via EventBridge or nSwitch Changeset.
Why migrate your volumes with Essentials?
Managing EBS storage volumes can be a complex and costly task, especially when dealing with resources not controlled by Infrastructure as Code (IaC). Organizations often find themselves spending more than necessary on storage and struggling to enact bulk automated updates efficiently. This monopolizes hours of engineering time while leading to high operational costs.
That’s why we added a new feature to Essentials for Storage allowing you to automate the laborious task of changing candidate volumes from gp2 to gp3 volumes, freeing up your time to focus on building and innovation.
How it works
If your resources are controlled by Infrastructure as Code (IaC), nSwitch Essentials integrates with Git and Terraform to streamline the process of identifying and fixing code related to storage optimization. This reduces manual work, making it fast and easy for engineers to take action on implementing cost-saving measures.
Utilizing nOps’ certified integration with Amazon EventBridge, nSwitch Essentials can also intelligently update configurations on resources that are not controlled by IaC. This can result in up to 20% cost savings and enables organizations to efficiently enact bulk automated updates of storage.
Steps to Configure Your nSwitch to Optimize Costs
Prerequisites
- Users must be logged in to their nOps account.
- Your AWS account must be linked to your nOps account.
- By default, AWS has a soft limit of 50 TB in gp3 EBS Volumes per region per account. Exceeding that limit with a migration through EventBridge will cause the migration to fail. Make sure to increase this limit if the total size of GP2 EBS volumes to be migrated is more than 50 TB in an account.
How to Increase EBS service quota
In case your post-migration gp3 EBS volume size exceeds that limit:
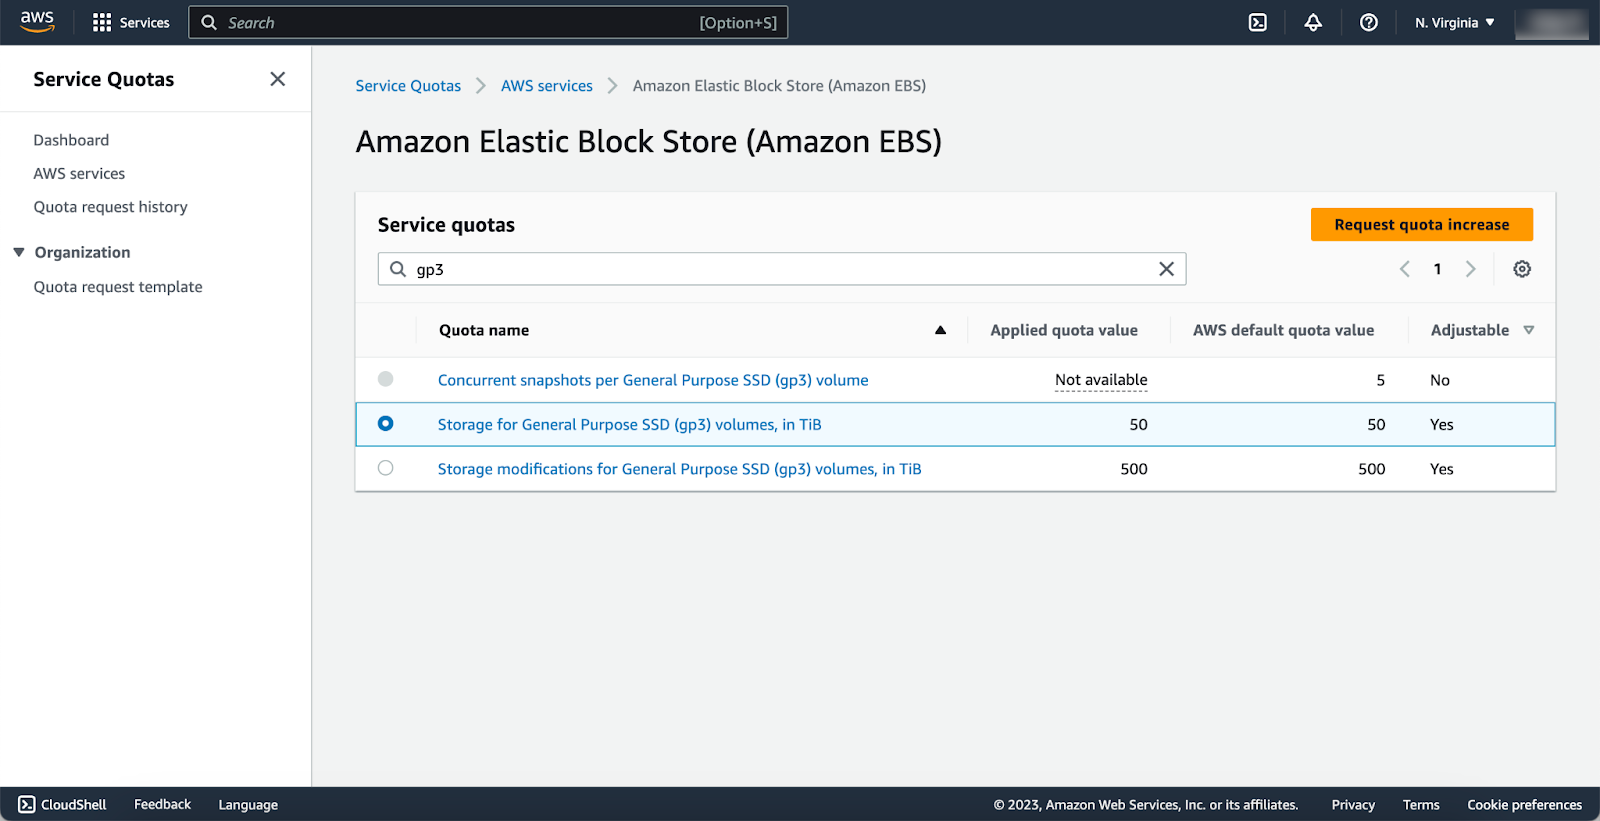
- Navigate to the EBS service in the quota console.
- Search for gp3.
-
Select the radio button for Storage for General Purpose SSD (gp3) volumes in TiB and click ‘Request quota increase’.
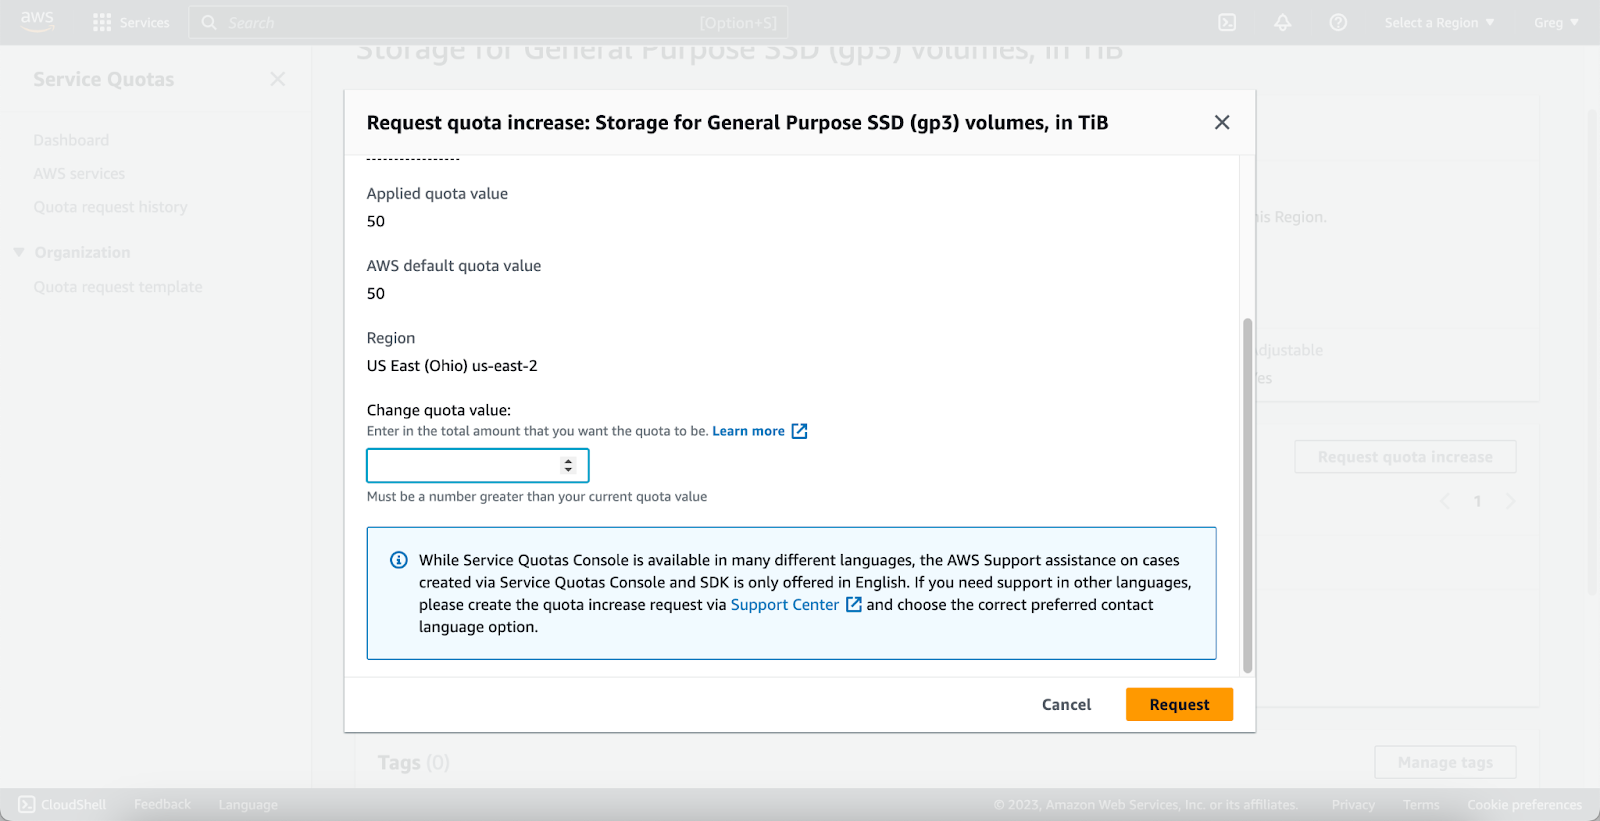
-
In the Change Quota box, enter the total amount that you want the quota to be.
- Click ‘Request’.
- Repeat this for each region and account for which you are planning on migrating gp2 to gp3.
Essentials EventBridge for cost optimization (non IaC managed resources)
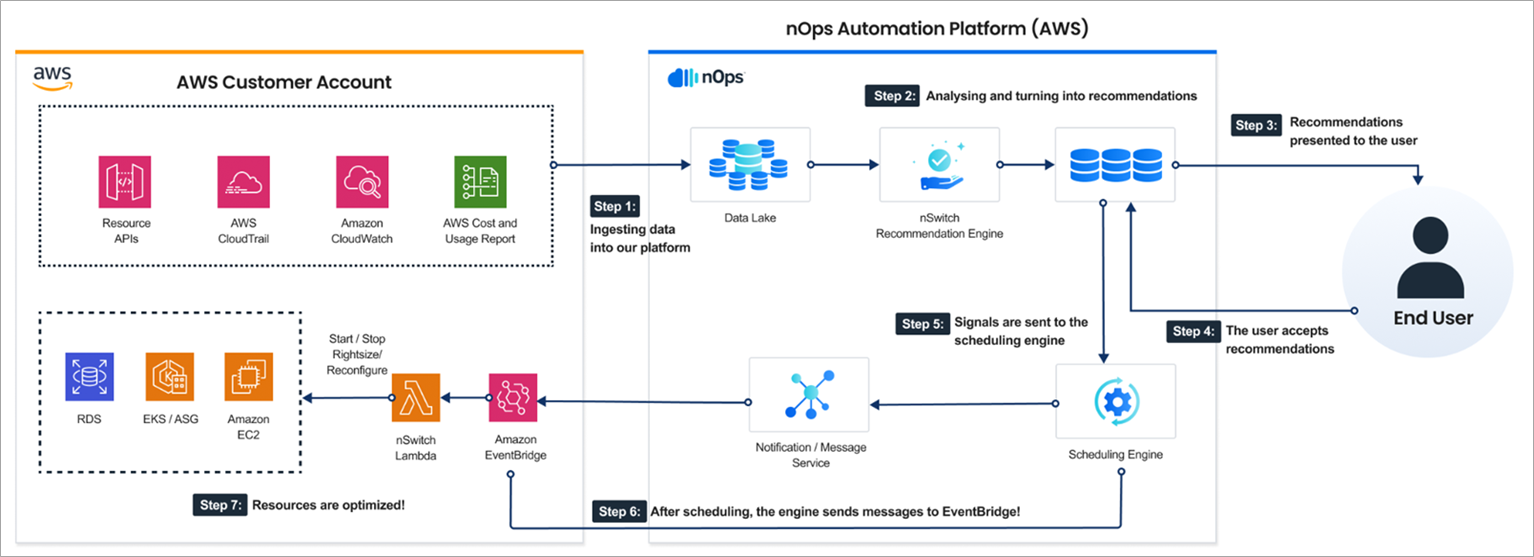
nOps is a certified partner event source in Amazon EventBridge. Create an EventBridge in your AWS account with just one click to deploy a small Lambda in your account via the CloudFormation template.
nSwitch Essentials analyzes your data and presents recommendations that you can act on with confidence. Schedule the optimization to happen now or later. nOps’ scheduling engine will securely send a signal through Amazon EventBridge to trigger the optimization.
Architecture Diagram
Steps :
- Create EventBridge for Essentials
- Navigate to the Organization settings > Integrations > EventBridge
- Provide EventBridge with a unique name and select an AWS account.
- Choose a ‘Region’ and create.

Note: You can select multiple AWS accounts and create the EventBridge in all selected accounts. **
- Configure the created EventBridge for Essentials
- Navigate to the Organization Settings > Integrations > EventBridge
- Click the ‘Launch Stack’ button in the ‘Essentials’ row for the required account.

Note: If You have created an EventBridge in multiple AWS accounts, you can follow the one-click Cloud Formation method to configure EventBridges in all accounts with a single Cloud Formation run using a stackset.
- Navigate to nSwitch > nOps Essentials module
- In ‘Storage Recommendations’, select any recommendation and open the detail page to configure.
- You can edit the ‘nSwitch name’
- Select the ‘Schedule pattern’ now or later
- By default, all resources in the recommendation are selected. You can select/deselect as desired.
- Finally, hit ‘Create nSwitch’ and you will be redirected to the** ‘Resource nSwitch’** tab.

nSwitch Essentials Changeset approach to cost optimization (Used for IaC managed resources)
- The feature works in two stages. First, it connects to your platforms and reads your data. It then identifies repositories and detects branches and state files within these repositories. This process is quick and seamless, with the system intelligently grouping recommendations and applying changes.

Steps :
- Connect your GitLab or GitHub with nSwitch Essentials. We will then scan your chosen repositories for Terraform files and identify S3 buckets containing Terraform state files.
- Navigate to Organization Settings > Integrations > nSwitch Changeset
- Configure Gitlab with your nOps accounts so nOps can scan your chosen repositories for Terraform files, Identify S3 buckets containing Terraform state files.
- You will be redirected to the Gitlab page where you can see the Gitlab integration success message.
- Repositories will be shown. Choose the one with Terraform files and click next.

Note:
- Make sure that you are logged into your Gitlab account in the same browser before you click on ‘Integrate Gitlab’.
- After a successful Gitlab integration message, it can take around 3 to 5 minutes and a browser refresh for the changes to reflect in our platform.
- You can see 2 sections: ‘Repositories’ and ‘Terraform state files’.
- You can choose an available branch from the drop-down, save it, and switch to Terraform state files. [In the following example we chose the master branch].
- In the Terraform state file section, you can see the AWS account. Here, you need to perform a ‘Launch stack.
- You will be redirected to the AWS console for the Cloud Formation process.
- Once the CF run is completed, nOps will analyze your data and generate the recommendation shortly.

- Go to nSwitch > nOps Essentials and choose the recommendation to create changeset nSwitch.
- Click on ‘Action’ to jump to the detail page where you can configure your nSwitch by entering a name and selecting resources.
- Upon confirmation, click on ‘**Convert to gp3’. **You will be redirected to the nSwitch dashboard with the new nSwitch created.

Note: If you don’t see nOps changeset type in the selected recommendation, then you can’t create nSwitch for the changeset. In this case, available resources in the recommendation must be migrated using Eventbridge.
- By default, nSwitch status would be ‘changeset submitted’
- Once nOps generates the PR in your Gitlab account, the generated PR link can be viewed from the nSwitch dashboard beside the Action column, which redirects the user to the Gitlab account’s merge requests section. In this case, the nSwitch status would be ‘changeset created’.
- Users can simply review and merge the changeset into their codebase to optimize storage and savings.