Webhook Integrations
- Configuring Webhook Integrations for 3rd party apps
- Before you begin
- Configure a Webhook
- Edit, or Delete a Webhook
Configuring Webhook Integrations for 3rd party apps
Use nOps Webhooks integrations to notify you when a specific event, such as a violation, occurs in your AWS cloud environment.
You must be an Admin user to set up a Webhook.
nOps Webhooks are easy to configure, use HTTP protocols, and are extensible. They support the standard GET, POST, PUT, PATCH, and DELETE operators.
This article contains the following topics:
Before you Begin
Before you begin
-
Login to nOps using an Admin role
-
From the Profile menu select Organization Settings to go to the Setting pane.
If you are a partner Admin, From the Profile menu select Manage Clients, select a client from the list, click the dot menu and select Go To This Account > then select Organization Settings from the Profile menu.
-
From the Settings pane click Integrations.
-
Select the Outgoing Webhooks tab
What to know before you create an Outgoing Webhook
-
Create outgoing webhooks to notify you about violations as they occur in your AWS environment.
-
Use the +Create Webhook to create as many webhooks as required
IMPORTANT: All fields marked with an asterisk are required. The webhook cannot be saved without this information. -
We currently support the following Event Type and Request Methods.
Note: The dialog choices change when a different Request Method is selected.
| For Event Type | Select this Request Method | Triggered |
|---|---|---|
| New Rule Violation | POST | Anytime a new rule violation occurs. |
| Reserved Instance Surplus | POST | When a Reserved Instance surplus is detected |
| Reserved Instance Deficit | POST | When a Reserved Instance deficit is detected |
Configure a Webhook
-
From the Integrations page select the Outgoing Webhooks tab.
-
Click the +Create Webhook button.
-
At the Create New Webhook dialog enter a Name for the webhook.
-
The select an Event Type from the available options. See the table above this section for a complete list.
-
The Request Method field contains GET, POST, PUT, PATCH and DELETE operators.
To send information about an event, select POST.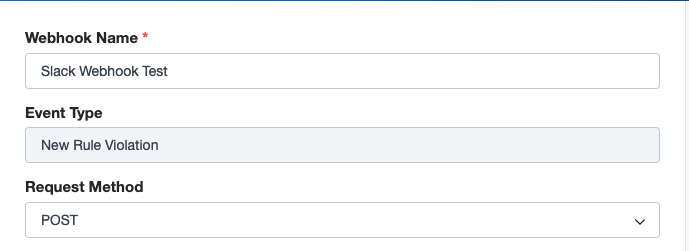
-
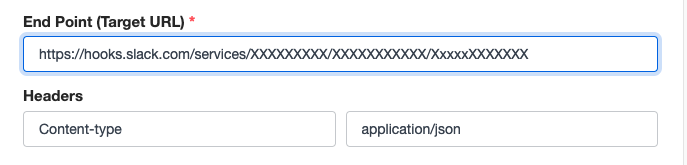
Enter the End Point (Target URL) information. An endpoint is the URL to which the notification will be sent. Most customers typically post to a specific Slack channel. You will need to get this URL from the target application. For example, for Slack see the following link on how to get started with incoming Slack Webhooks.
-
Once the webhook is created, the target application provides information about the Header key and value pair. For example, for Slack the header and value pair are:
Content-type and application/json
You can add multiple Headers if required.
-
The Substitutions table displays attributes that you can use in the Request Body for information about the event. Your choices are:
     The time the event was detected

     The name of the rule that was violated

     Details about the event or rule.
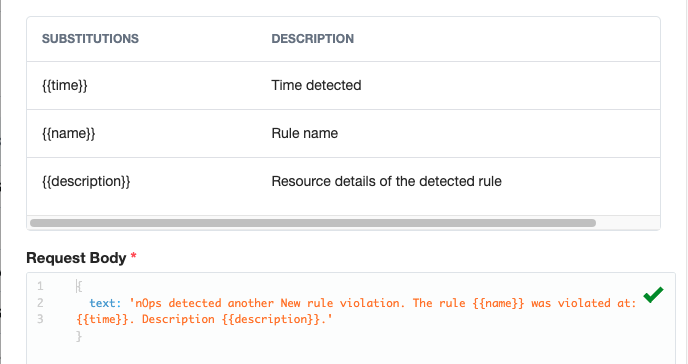
- The Request Body contains an automatic JSON validator to check the code you enter.
Add or edit the text attribute to send a specific message as seen in the following example:
    {
      text: 'nOps detected another New rule violation. The rule  was violated at: . Description .'
    }
For a Reserved Instance Surplus the message could be as follows:
{ text: 'nOps detected a Reserved instance Surplus in your account at: . Description .'}
- Click Save to save the webhook.
Edit, or Delete a Webhook
Once a webhook is created, you can edit it, or delete it from the list on the Outgoing Webhooks tab.
-
Click the Edit icon to edit a webhook. For example, if you need to change the endpoint location
-
Delete the webhook using the Delete/Trash icon.
Note: Once a webhook is deleted the information cannot be recovered.