Integrating Jira into your cloud optimization workflow has never been easier!
- Adding Jira Integration
- Key features of the Integration
- To Add Jira Integration as an Admin User
- To Add Jira Integration as a User or as a Member
Adding Jira Integration
With nOps new OAuth 2.0 Jira integration, nOps has simplified the process to attach your Jira instance. This allows you to quickly create and assign task for issues discovered by nOps. To integrate Jira using a simple sign up process you must allow access to your Atlassian account. Once completed you can create and assign a Jira ticket in your company’s Jira environment without having to leave nOps.
Key features of the Integration
Among the key features of the integration are that:
-
All users are able to add Jira tickets and you do not need to be a Jira or nOps Admin user to do so. For your convenience we have described 2 ways in which you can integrate Jira.
-
The integration is simple and does not require extensive configuration, however you must provide a link to your companies Atlassian Jira account in order to connect it.
-
Once the integration is complete you can create a Jira ticket through any Resource Details dialogs. These are available from any of the following areas:
-
Spot Advisor
-
Tag Explorer
-
Resource Rightsizing
-
nOps Rules
-
AWS Inventory
-
SOC2, HIPAA, CIS Readiness Reports
-
Workloads
-
Note: nOps currently integrates a single Jira account per nOps user.
To Add Jira Integration as an Admin User
-
Login to your nOps account.
-
Select Organization Settings from the Profile menu.
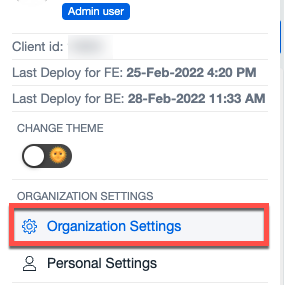
-
From the left pane select Jira Cloud and follow the prompts to accept the integration.
-
Once the integration is set up, refresh your instance in order to update your settings.
-
Return to the Settings Pane and click Jira Cloud to display an option to select a project from the drop-down.
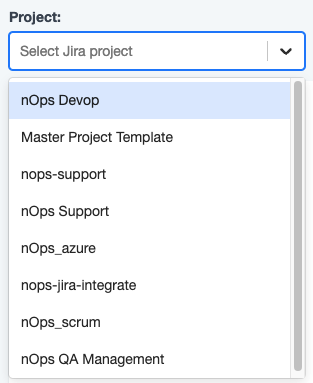
-
If any associated Jira tickets are available for the selected project you will be able to view them on a status board.
-
Click a ticket to open it.
To Add Jira Integration as a User or as a Member
-
Login to your nOps account.
Navigate to and open any area that contains a resource detail, workload WAFR, or Lens assessment.
Example: Navigate to a tab, such as the Security Dashboard and select a rule name that contains a violation by clicking the arrow icon on the right.

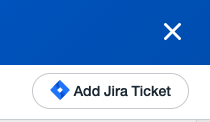
Click on Resource Details for any of the items in the list.

Click Add Jira Ticket icon on the top right of the Details dialog
OR
-
Click the Workloads tab to list the workloads and select a workload from the list.
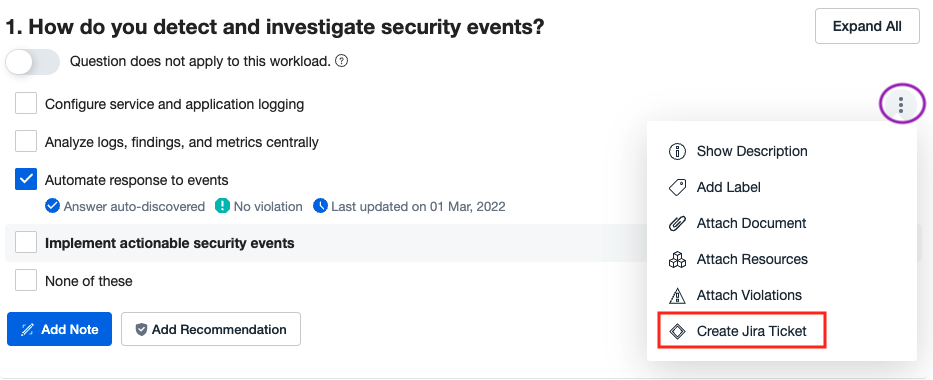
Turn on a Lens or Compliance Framework toggle and click on Assessment.
At the Assessments page, right-click on a dot menu and select Create Jira Ticket.
-
Follow the onscreen prompts to accept the integration.
-
When prompted to select a site, select the Jira link for your environment from the drop-down.
-
Once the integration is completed, refresh your browser to update your settings.
The next time you click Create Jira Ticket you can begin to create and attach Jira tickets into your nOps workflow.
And that’s it!
What if I have already configured Jira integration in my nOps environment?
If you have an existing configuration you may need to follow the on-screen prompts when opening a ticket, to take advantage of the new integration.
Back to top Home