Reduce your cloud cost by cleaning up your Idle EBS Volumes
When EC2 instances are frequently launched and terminated, orphaned EBS volumes often go unnoticed, leading to significant cloud waste. Unless the “Delete on Termination” option is selected during the instance launch, terminating an EC2 instance will only detach the associated EBS volume rather than delete it. Consequently, unused EBS volumes can accumulate over weeks or months, consuming resources and increasing costs.
What is an Idle EBS Volume?
An idle EBS volume, defined by nOps, is an EBS volume that has been orphaned or unattached from any EC2 instance for a period exceeding 10 days. These volumes can accumulate unnoticed, consuming storage resources and contributing to unnecessary costs. Identifying and managing idle EBS volumes is crucial for optimizing cloud resource utilization and minimizing expenses.
Here’s how nOps enhances the process:
-
Effortless EBS Volume Cleanup: nOps simplifies the identification and deletion of unused EBS volumes with a single click, eliminating the need for manual cleanup and freeing up valuable engineering resources.
-
Minimal Risk: Before deleting a volume, nOps provides the option to take an economical snapshot, ensuring you have a backup available if a rollback is needed. This feature offers peace of mind while optimizing costs.
-
Intelligent Savings: nOps delivers recommendations that guarantee net savings. For instance, it avoids suggesting snapshot creation for Cold HDD (sc1) volumes, where savings might not be realized, ensuring that every action taken results in tangible cost benefits.
How it Works
-
If you’re onboarded to nOps, data will automatically be collected from your AWS API.
-
If an EBS volume is not associated or attached with any EC2 instance for the last 10 days, it is considered orphaned.
-
You have two options when cleaning up EBS volumes: you can either create a snapshot before deleting the volume to ensure a backup is available, or you can choose to delete the volume immediately without creating a snapshot for a quicker cleanup and to avoid paying the small fee of storing the snapshot.
Step-by-Step Guide on How to Stop Idle Instances with nOps Essentials
-
Sign In: Sign in to the nOps platform using your credentials.
-
Access Idle EBS Volumes Recommendations: Navigate to the Essentials Menu and select the Idle Instance Page. Here, you’ll find recommendations for idle EBS Volumes to stop.
-
Review Recommendations: Take a moment to review your recommendations. You can view details such as Environment, Resource Count, Yearly Savings, and an action button to view more details and create the automation.
****
-
On Action Page: Here, you’ll need to either select EventBridge or configure it if it’s not available. This step is crucial for automation. Additionally, choose the desired time frame for the automation to run, ensuring it aligns with your operational needs.

5) Confirm Selection and Estimated Savings: By default, all EBS volumes are selected. You can deselect any instances if needed. Review the estimated savings and confirm the action.
-
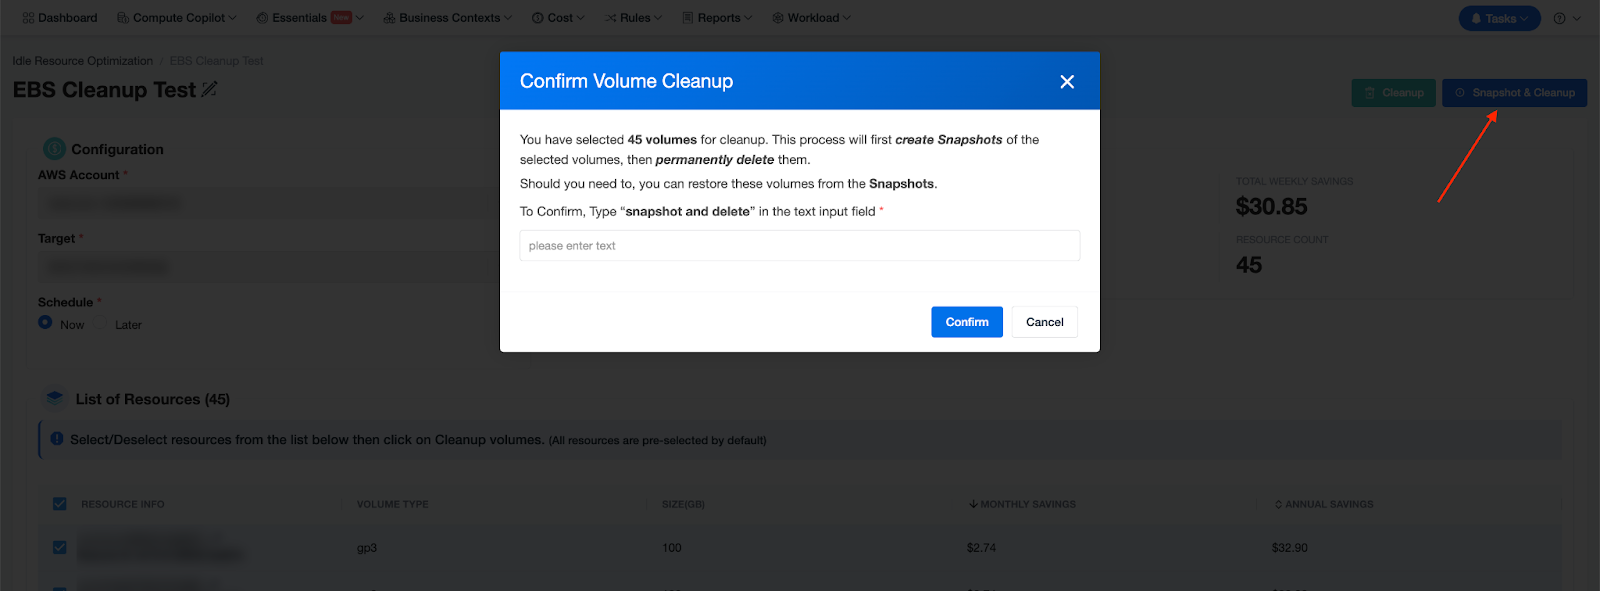
Confirm Automation: When cleaning up EBS volumes, you can choose whether to create a snapshot before deleting the volume.
- If you want to preserve the option to roll back, you can click the “Snapshot & Cleanup” button to automatically create snapshots of all the EBS volumes that you have selected in the recommendations.
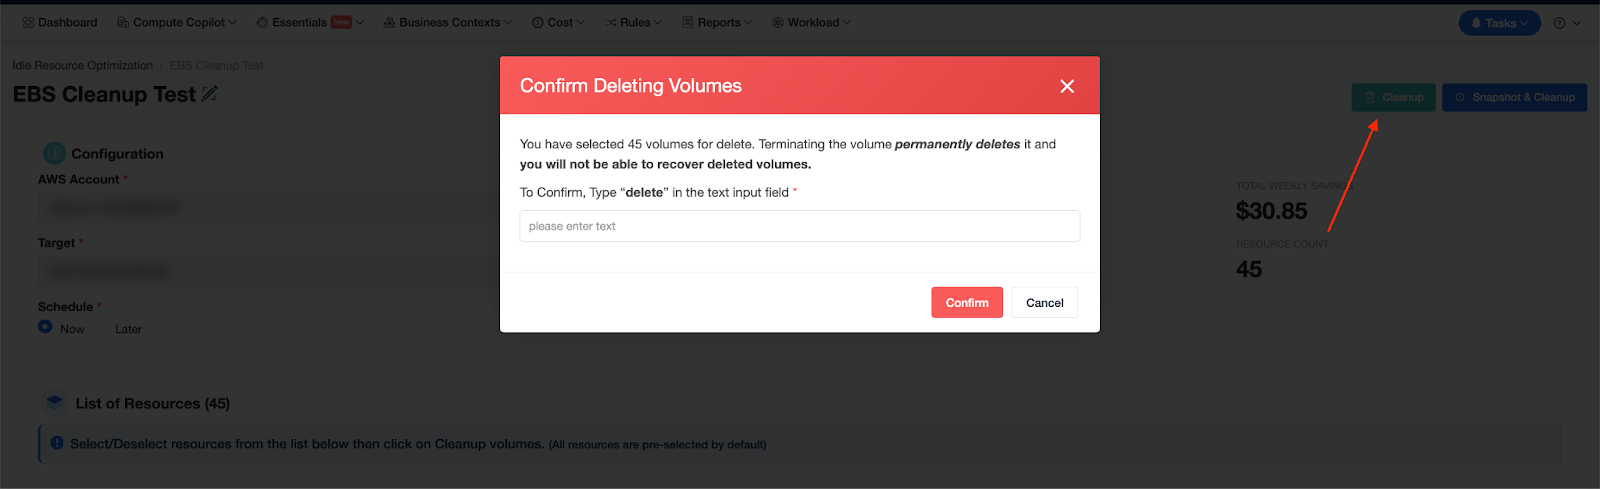
- If you want to delete the EBS volume without a snapshot, you can do so by clicking the “Cleanup” button to confirm the automation.
- Initiate Stopping Process: Once you confirm the cleanup, you will be redirected to the Summary tab of the Idle Resources page, where you can Verify Automation Status and see the automation schedule. If you’ve selected “Now” for automation, by default, it will be scheduled 10 minutes from now. You have 10 minutes to cancel the automation by deleting the schedule. Once the automation triggers, all selected volumes will be deleted accordingly.
