Introduction to nOps Essentials
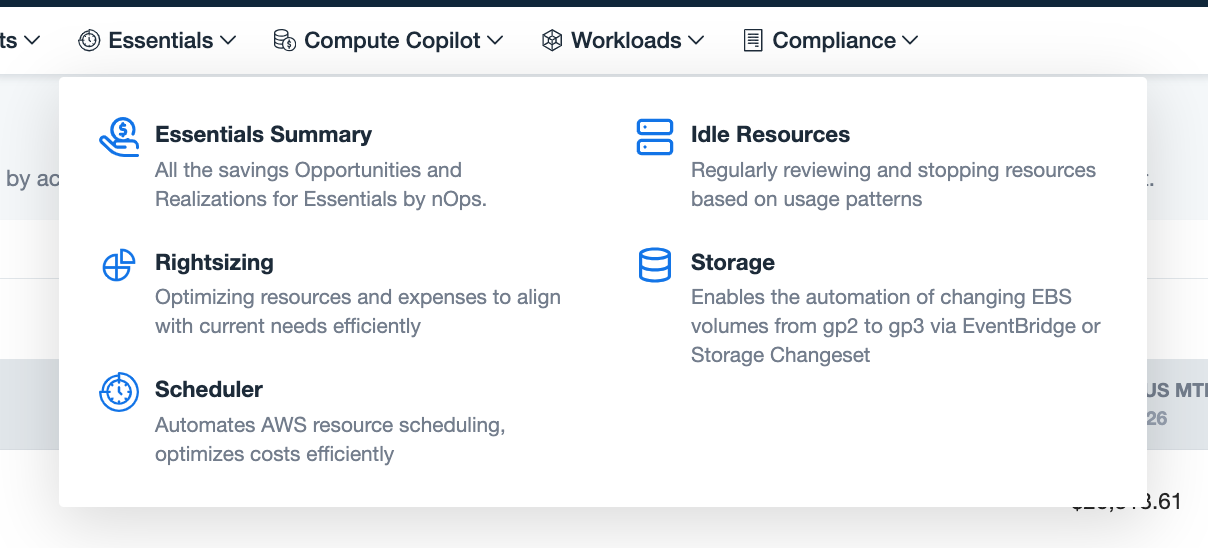
The menu provides an overview of various nOps Cloud Optimization Essentials features to help streamline and automate your cloud resource management and cost efficiency. These include:
-
Essentials Summary
- Overview of all savings opportunities and realizations for nOps Essentials
-
Rightsizing
- Right sizing EC2 instances and Auto Scaling Groups
-
Scheduler
- Automates AWS resource scheduling to reduce costs during off-hours
-
Idle Resources
- Finds and stops unused resources such as EC2 and EBS volumes
-
Storage
-
Automatic migration of EBS volumes from GP2 to GP3 via EventBridge or Storage Changeset.
-
EBS Snapshot optimization
-
Essentials Summary
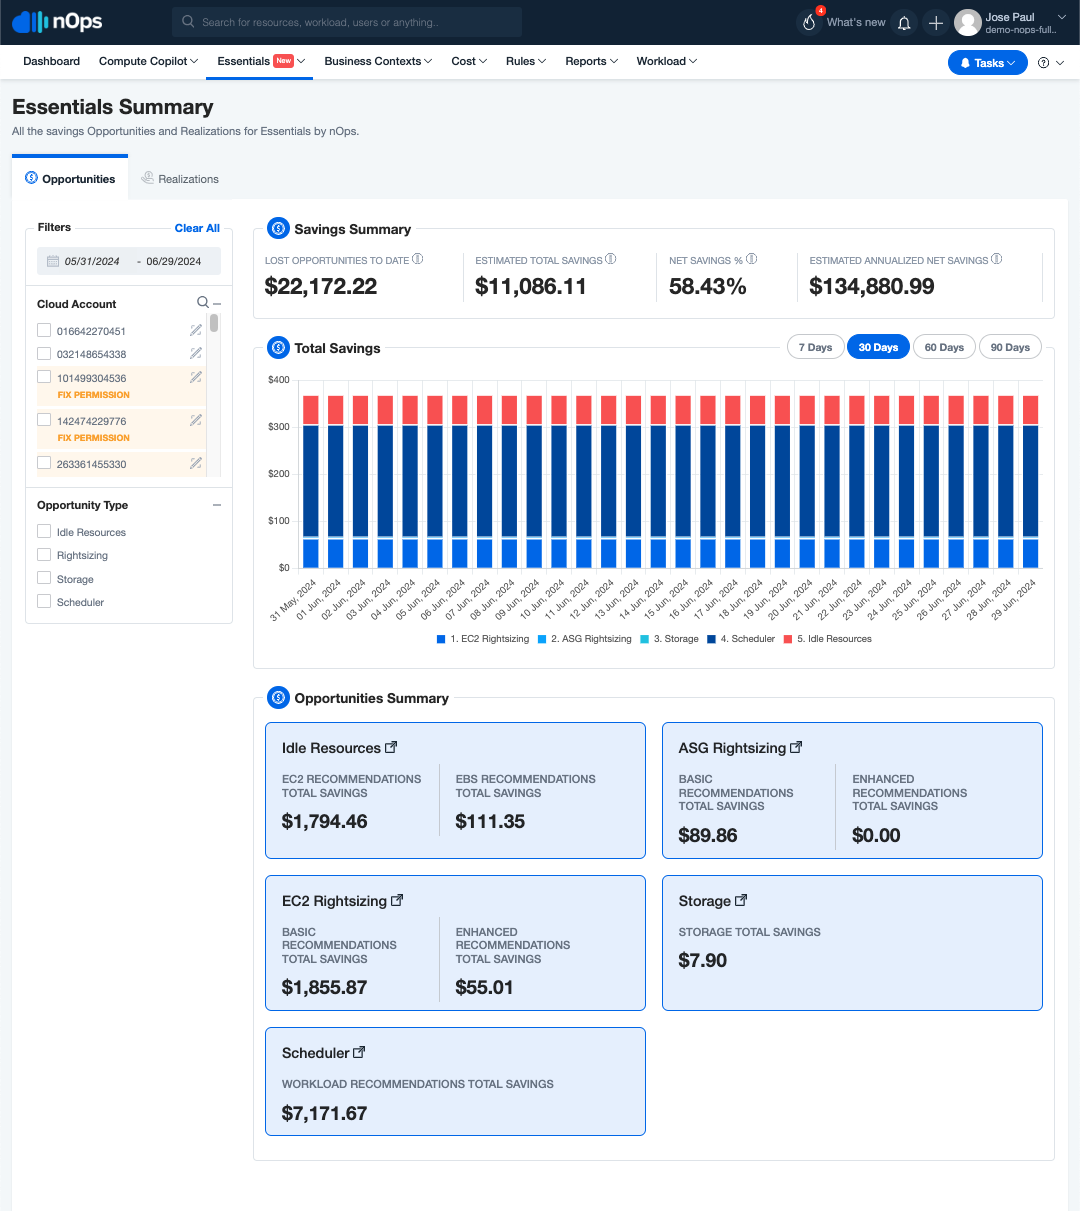
The Essentials Summary Page in nOps offers a streamlined view of your cost-saving opportunities and their realizations. Here are its key features:
-
Filters: Customize data by date range, cloud account, and opportunity type to focus on the most relevant information.
-
Savings Summary: Provides a quick snapshot of your potential and realized savings, including lost opportunities, estimated total savings, net savings percentage, and annualized net savings.
-
Total Savings Chart: Visual representation of daily, weekly, or monthly potential savings categorized by EC2 Rightsizing, ASG Rightsizing, Storage, Scheduler, and Idle Resources.
-
Opportunities Summary: Breaks down potential savings into specific categories, allowing you to identify and act on the most impactful cost-saving measures.
These features enable you to monitor, analyze, and optimize your cloud costs effectively.
Rightsizing

Overview of EC2 rightsizing
nOps EC2 rightsizing generates recommendations based on detailed utilization metrics collected via Datadog or the AWS CloudWatch agent. These data-backed and accurate recommendations can be verified in the nOps dashboard and applied with one click.
Rightsizing Recommendations
-
View the recommendations summary.
-
Select the action button to proceed with rightsizing.
-
Schedule and verify the operation.
Datadog Agent in ASG for Enhanced Rightsizing
Few tools offer ASG rightsizing recommendations, despite ASGs being a huge portion of your compute costs. nOps automatically analyzes every EC2 instance in your environment (including short-lived ones) and groups them into their respective ASGs using metadata. This provides a clear view into your ASG resource consumption at an aggregate level and access to cost-saving recommendations.
For each instance within an ASG, our rightsizing algorithm compares the maximum recorded usage of key metrics against the capacity of a lower instance type, multiplied by a threshold value that accounts for potential future usage spikes. nOps takes into account the aggregate performance and utilization metrics of all instances within an ASG to make informed recommendations.
If all of the instances can be rightsized, the ASG can be rightsized. If there are several instance types, they can be analyzed and rightsized separately.
These rightsizing recommendations are then pushed to nOps microservices, which are responsible for showing recommendations from within the nOps platform.
Installing the Datadog Agent
-
Create or update an EC2 Launch Template for the Datadog agent.
-
Add the user data script for installing the agent.
-
Apply the configuration and restart the Datadog agent service.
Datadog Agent Configuration on Your Linux Based ASG
Datadog Agent Configuration on Your Linux Based ASG
Steps to Configure Datadog Agent
-
Update the EC2 launch template with Datadog agent installation script.
-
Configure Datadog to prefer IMDSv2.
-
Restart the Datadog agent service to apply changes.
CloudWatch Agent Configuration on Your Linux Based EC2
CloudWatch Agent Configuration on Your Linux Based EC2
How to Install Amazon CloudWatch Agent
-
Attach the necessary IAM role.
-
Install and configure the CloudWatch agent on the EC2 instance.
-
Enable the desired metrics and confirm the configuration.
Scheduler
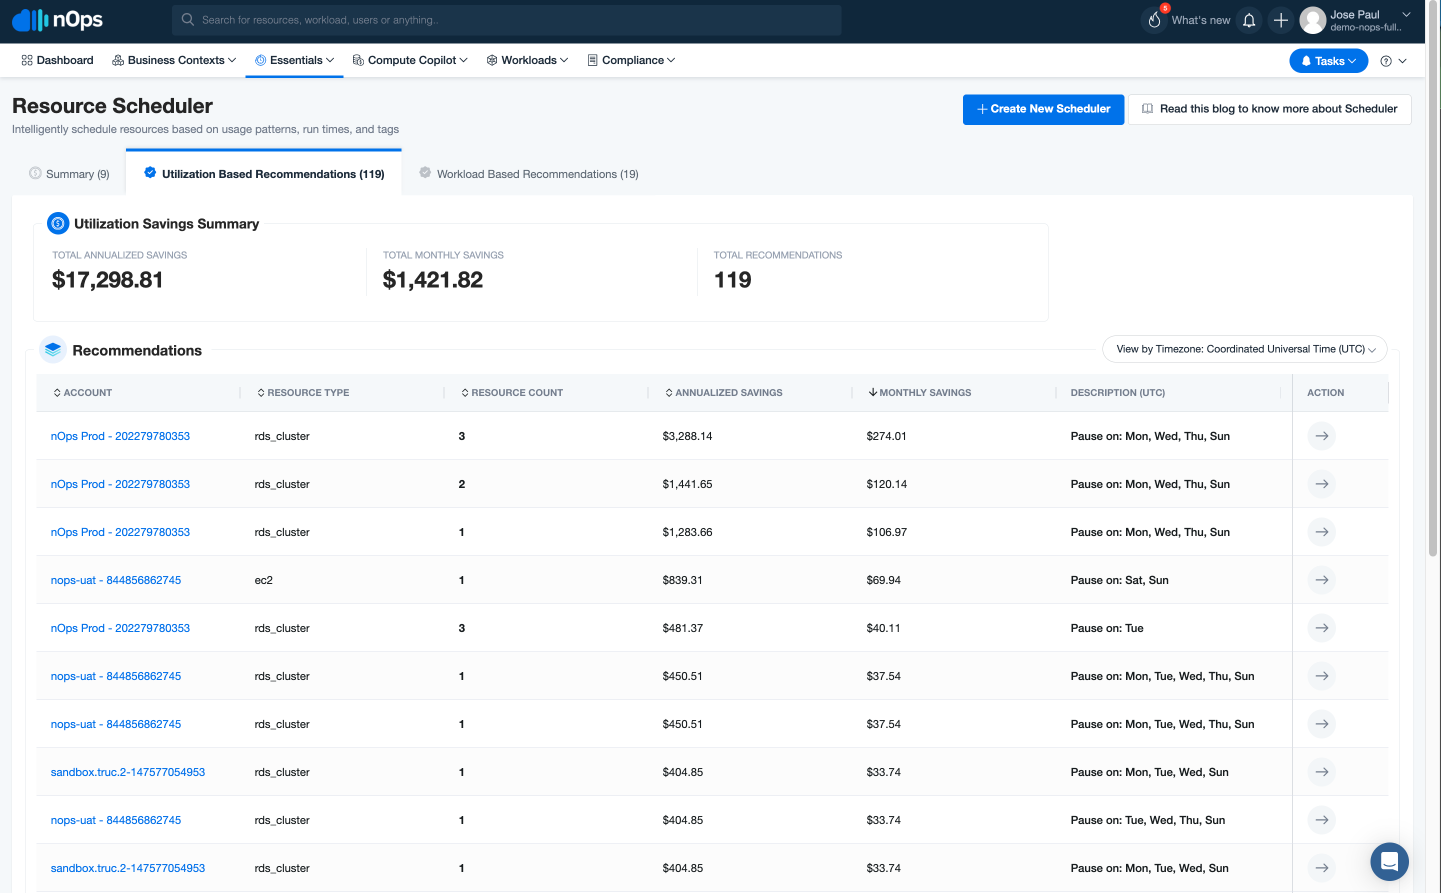
What is nOps Scheduler?
Chances are, your resources don’t need to be running 24/7. nOps Scheduler leverages EventBridge to automatically pause unused cloud resources, such as EC2 instances, and integrates with Terraform to create, manage, and monitor schedules and resources.
Based on historical utilization data, we can identify the hours when an instance is not needed. nOps Scheduler continually provides a list of recommended resources to put on a schedule. Apply with one-click to schedule and save.
Summary of Steps
-
Identify AWS idle resources using nOps. (Link)
-
Create a new schedule on the nOps Dashboard.
-
Add tags to your Terraform code. (Schedule a resource using Terraform)
Creating a Schedule
-
Log in to your nOps account and navigate to Essentials > Scheduler > Create New Schedule.
-
Select the time zone and time to schedule the resource.
-
Apply the Terraform code to implement the changes.
Idle Resources

With nOps Essentials, it’s easy to eliminate in bulk unnecessary and wasteful hidden costs like EC2 instances and EBS volumes.
What is an Idle EBS Volume?
An idle EBS volume is defined by nOps as a volume that has been detached from any EC2 instance for over 30 days. These volumes consume storage resources and incur unnecessary costs.
How idle EBS volume works
-
Identify idle volumes using nOps.
-
Choose to either create a snapshot before deletion or delete immediately.
-
Automate the cleanup process using nOps Essentials.
Step-by-Step Guide to Stop Idle Instances
Step-by-Step Guide to Stop Idle Instances
-
Sign in to the nOps platform.
-
Access the Idle EBS Volumes Recommendations.
-
Review and confirm the cleanup process.
-
Initiate the stopping process and verify automation status.
Storage

Introduction
The Essentials Storage feature is optimize cost and performance with features like one-click EBS volume migration to GP2 to GP3 and automated snapshot cleanup.
Why migrate your volumes with Essentials?
Why migrate your volumes with Essentials?
-
Cost Efficiency: Save on storage costs by migrating to more cost-effective volumes.
-
Automation: Simplify the migration process through automation.
-
Performance: Improve performance with newer storage types.
How volume migration works
-
Identify idle volumes for migration.
-
Use the Essentials Storage feature to automate the migration process.
Automated EBS Snapshot Cleanup
Automated EBS Snapshot Cleanup
Automated cleanup of orphaned and unused EBS snapshots to reduce storage costs. The system identifies outdated snapshots based on criteria like age, frequency of use, and unreferenced data, and moves them to cheaper storage tiers, ensuring data access is retained while significantly lowering costs.
How EBS snapshot cleanup works
-
Snapshots are evaluated based on age, usage frequency, and unreferenced data. Snapshots meeting the criteria for cleanup are identified and recommended for archiving.
-
Users can review and approve cleanup recommendations in bulk, archiving outdated snapshots to cost-effective storage tiers with a single click.
Steps to Configure Your nSwitch to Optimize Costs
Steps to Configure Your nSwitch to Optimize Costs
-
Log in to your nOps account.
-
Navigate to the Essentials Storage section and select the volumes to migrate.
-
Follow the on-screen instructions to complete the migration.