nOps Scheduler with Terraform Guide
What is nOps Scheduler?
nOps Scheduler automatically pauses unused cloud resources, such as EC2 instances, EC2 Autoscaling groups, EKS node groups, RDS instances, and RDS Clusters. nOps Scheduler integrates with Terraform to create, manage, and monitor schedules and resources.
Why use nOps Scheduler?
- Cost optimization. Scheduling can save organizations a significant amount of money on Dev and QA costs, especially during off-peak hours.
- Time savings. Lack of time and resources is a key blocker preventing engineers from reducing cloud spend — nOps Scheduler makes identifying and scheduling underutilized resources simpler and faster.
- Automation. Our AI is constantly learning your usage patterns for greater savings.
Summary of Steps
In order to schedule an instance:
- Identify AWS idle resources using nOps.
- Create a new nSwitch on the nOps Dashboard.
- Add tags to your Terraform code.
Identify resources for scheduling
To identify resources for scheduling on/off cycles using nOps
- Log in to the nOps Dashboard > click on Essentials > nOps Scheduler.
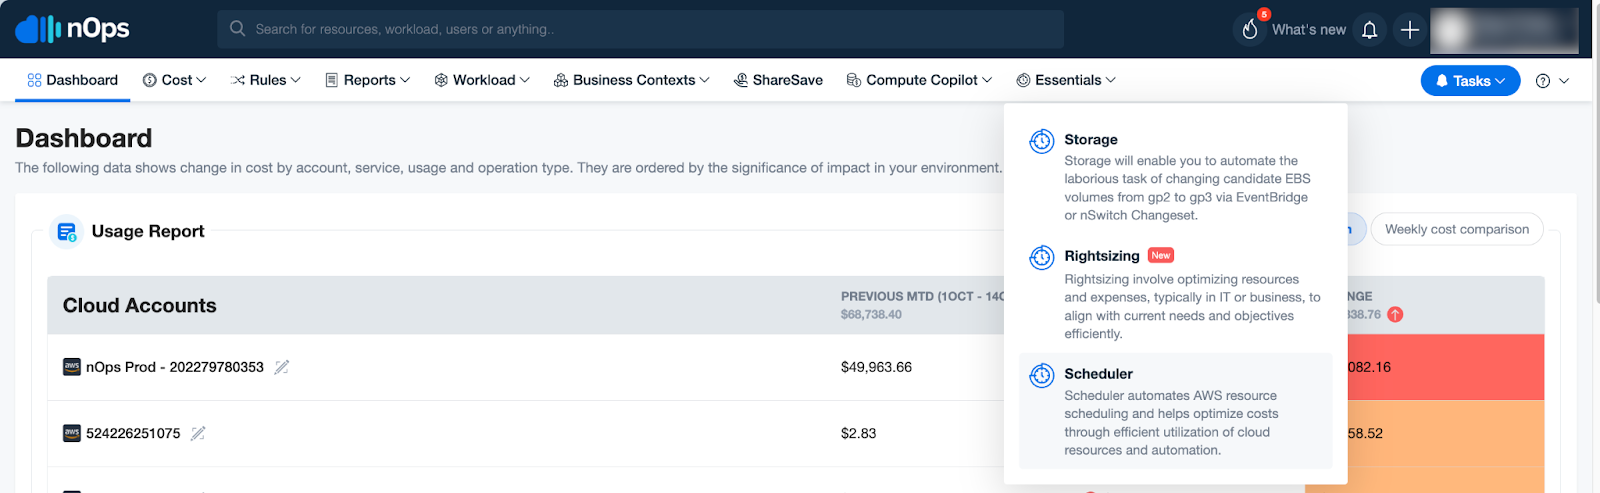
- Click on Utilization-Based Recommendation or Workload-Based Recommendation.
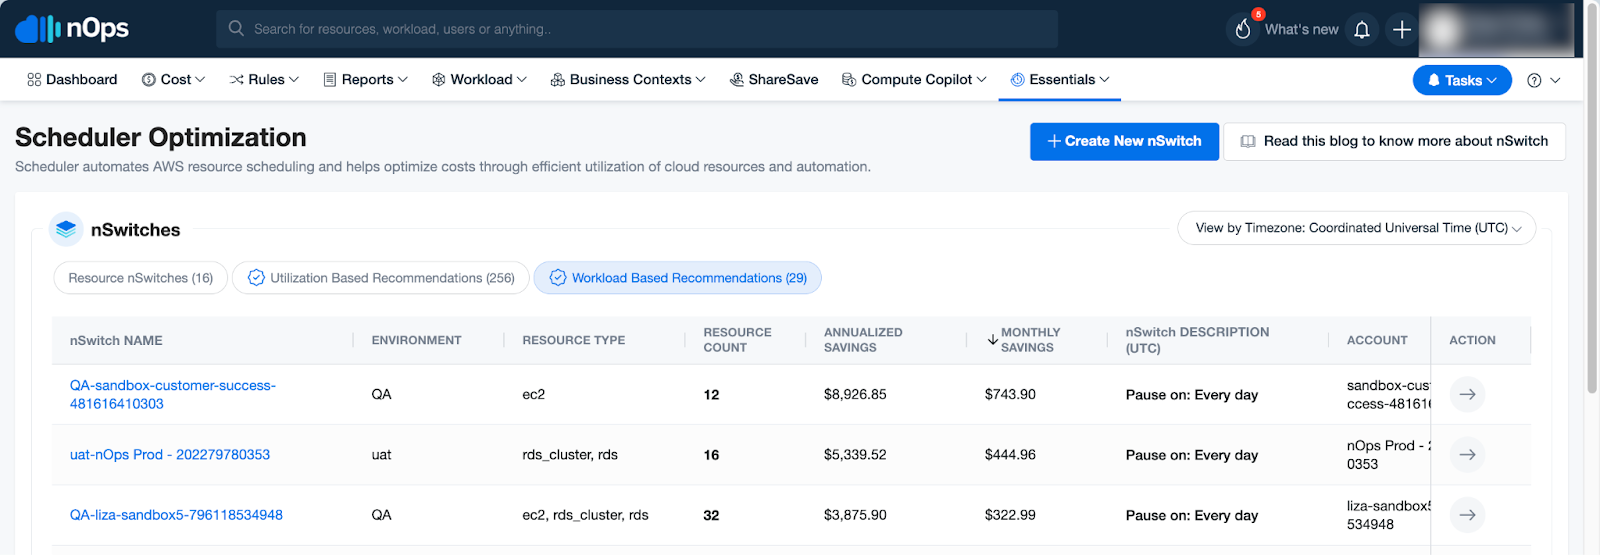
This page contains your Scheduler Optimization recommendations. The Utilization-Based recommendations are generated by analyzing your AWS Cloudwatch and other important logs for information such as CPU, Memory, Disk Read/Write OPS, and network transfer bits. Resources listed here have a 95%+ confidence rating of being idle, and eligible candidates to be scheduled off/on in accordance with the proposed schedule.
The Workload-Based Recommendations are workloads in non-production environments which nOps has determined through the account they live in, tag, or resource name.
This page also provides other information such as logs, historical cost data, etc.
Create an nSwitch
Follow the steps to create your schedule (for our example, an RDP server).
-
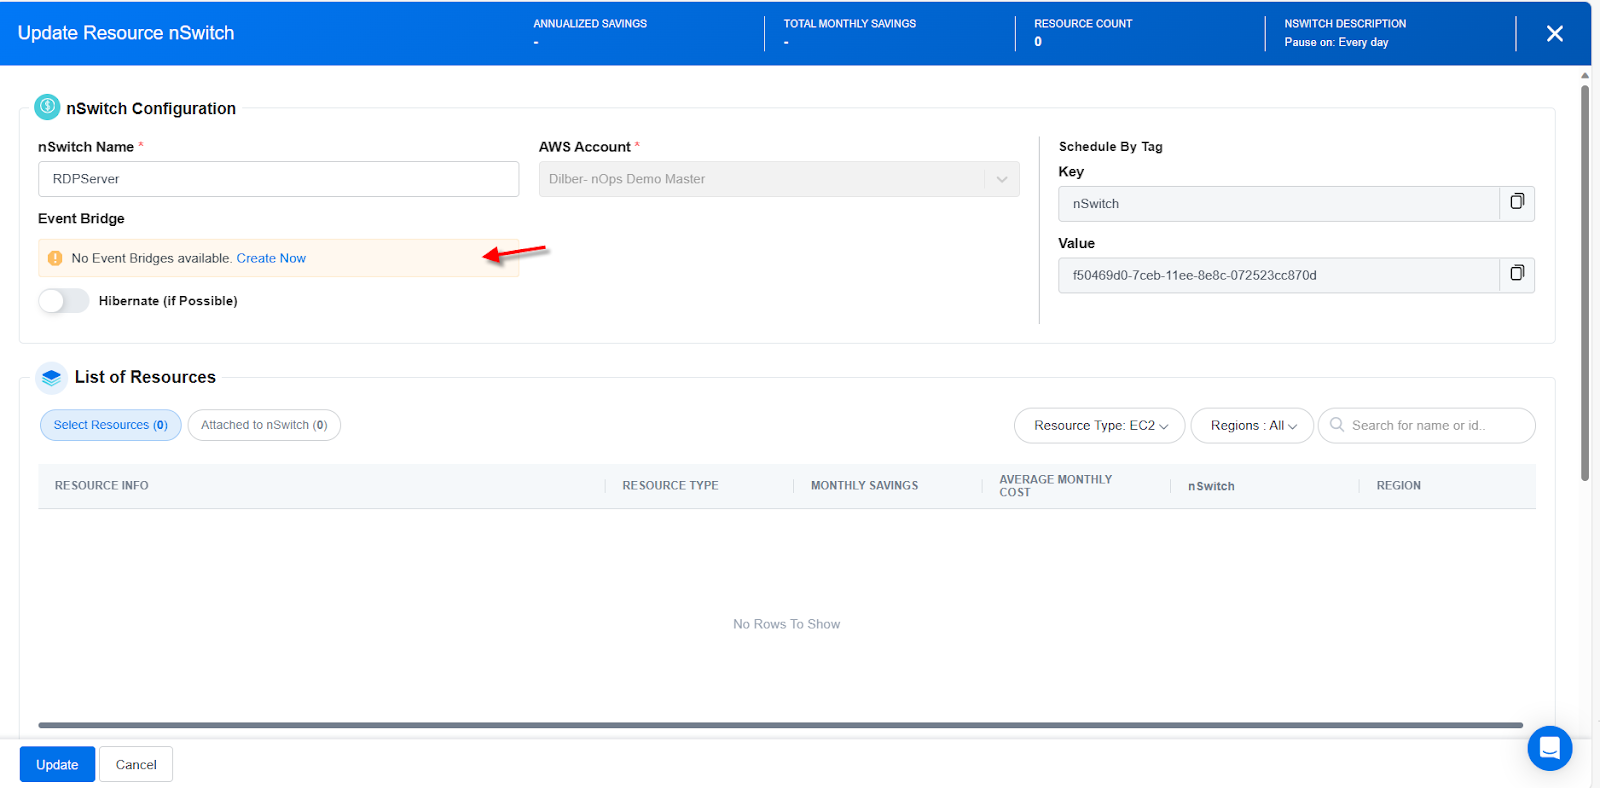
Log in to your nOps account > Essentials > nOps Scheduler > Create New nSwitch.
-
Type your nSwitch Name and select your EventBridge.
Note: If you don’t have EventBridge configured, read this article first. -
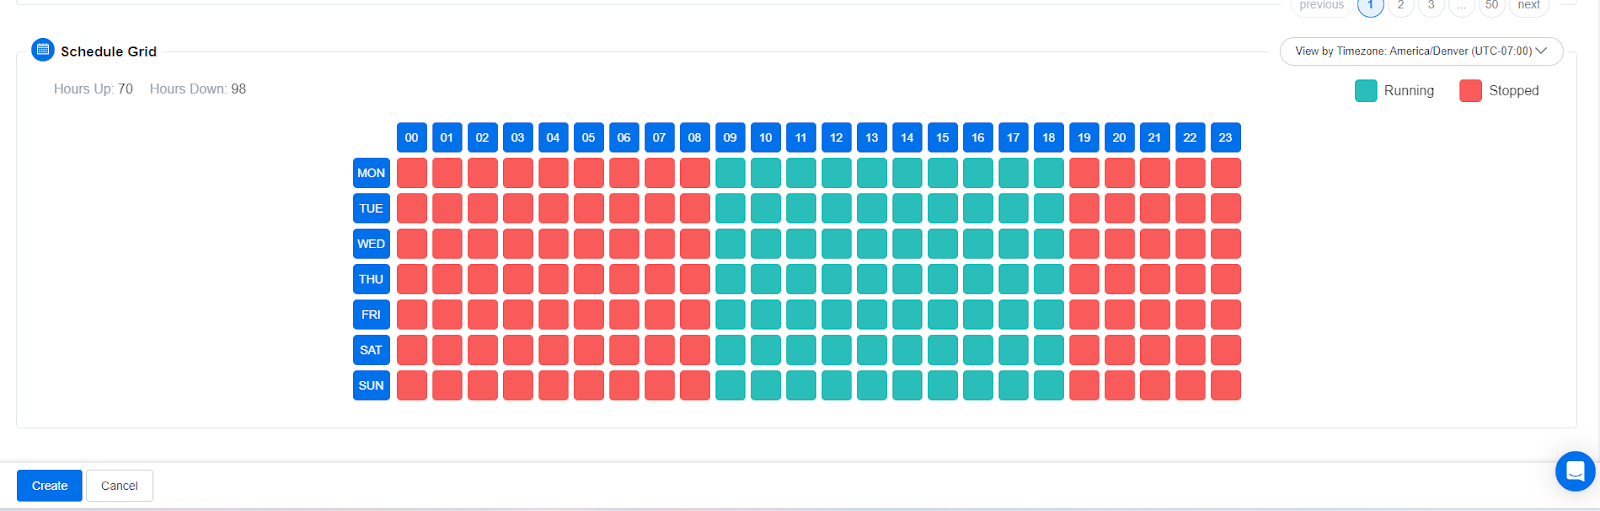
Scroll down and select the time zone and time to schedule the resource(s). In this example, the RDP server will be scheduled to run from 9 a.m. to 6 p.m. on weekdays.
-
Select Create.
Schedule a resource using Terraform
Open your nSwitch and copy the Key and Value for Terraform.
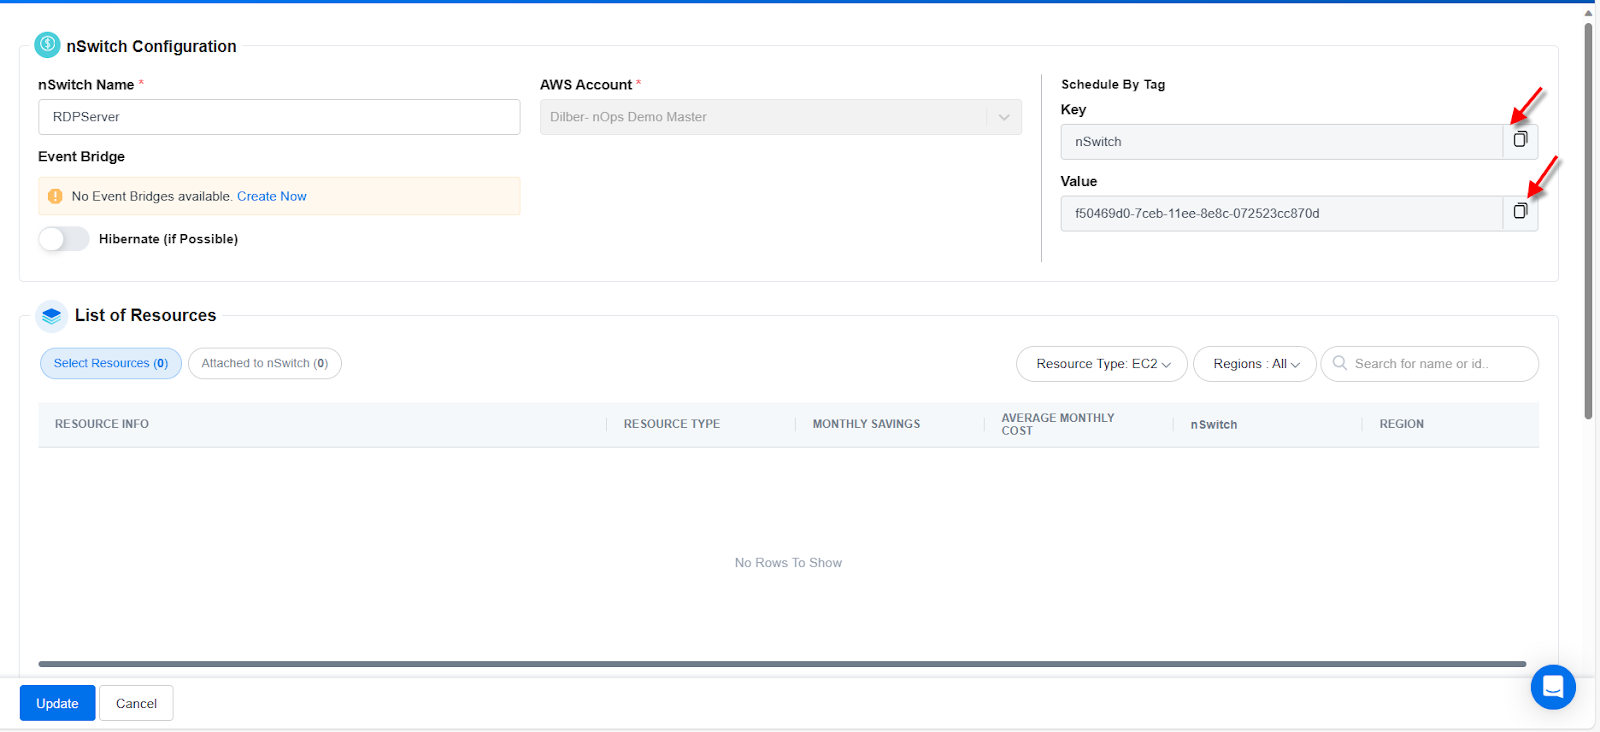
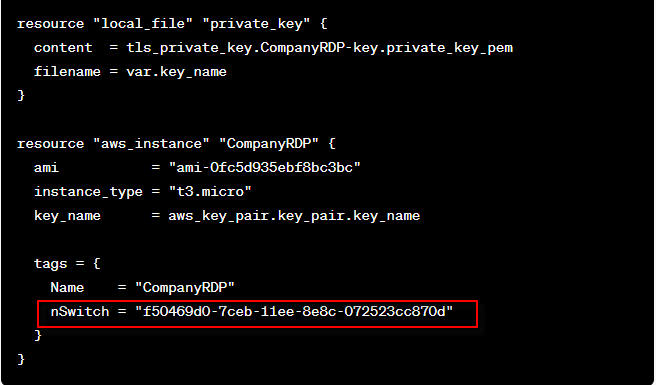
Add the nSwitch Tag to the Terraform code. After copying the Key and Value from nSwitch, open your Terraform code and paste it under the tags section, following the instructions provided in this image. Then, apply the Terraform code to implement the changes.
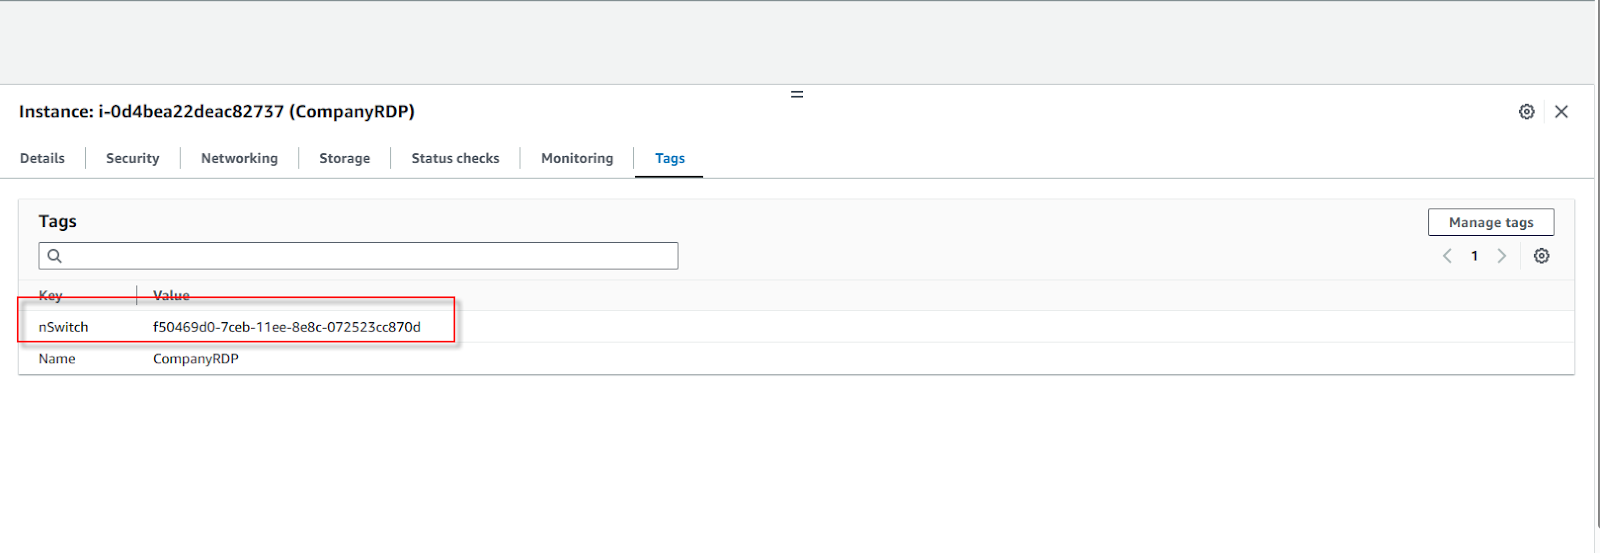
Once you apply the code, you will see a new tag attached to the resource.
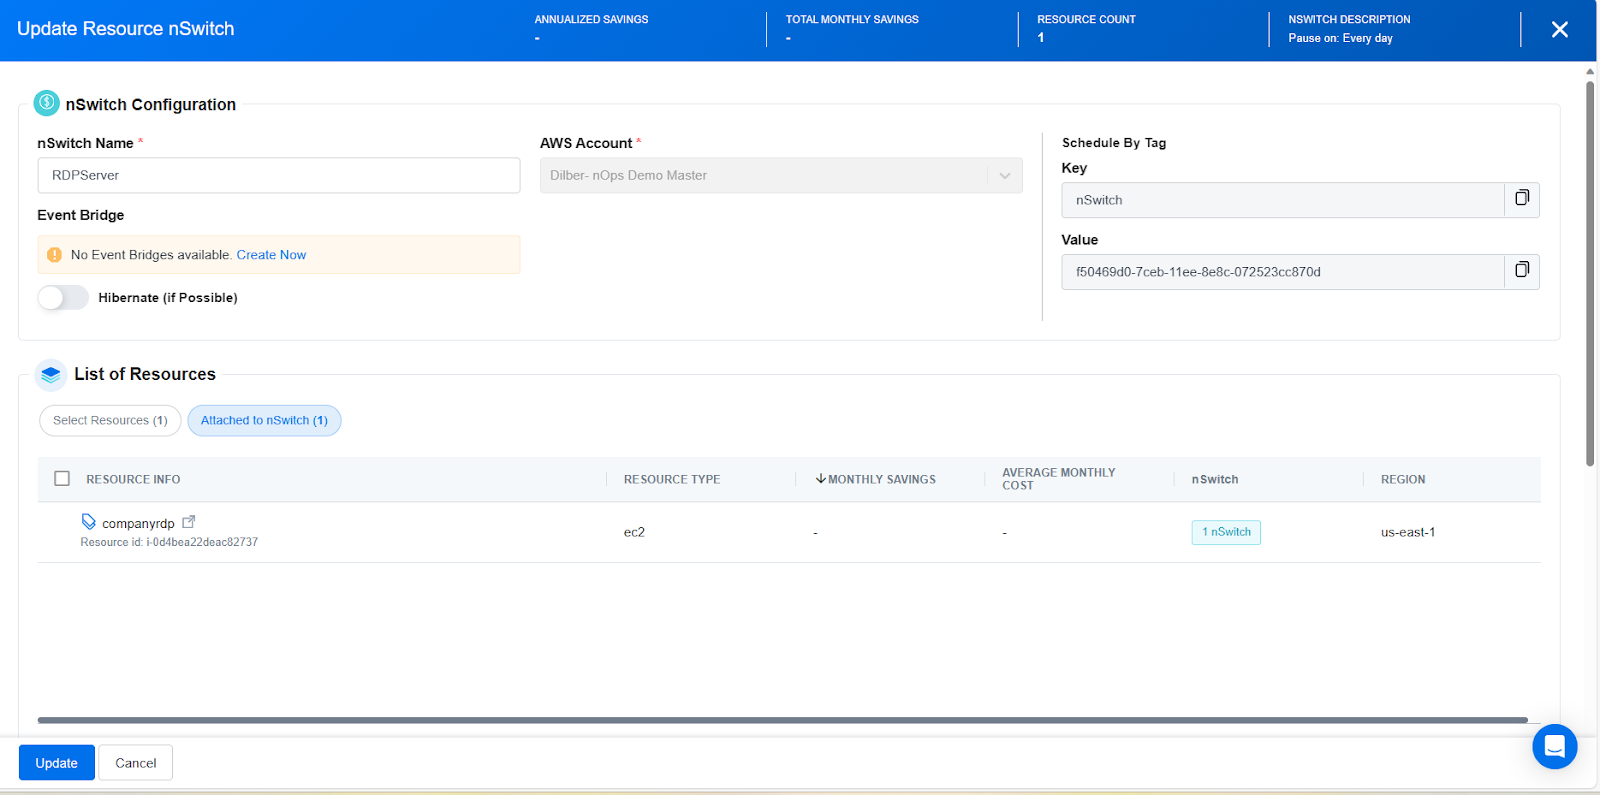
After successfully adding tags to AWS, it takes nOps approximately 24 hours to display the resources under nSwitch.
nOps makes it easy to identify idle resources and schedule them via Terraform. If you don’t have a nOps account, get started today.