Configuring EventBridge for Scheduler
Prerequisites
- You must be logged in to their nOps account.
- Your AWS account must be configured to your nOps account.
What is AWS EventBridge?
Amazon EventBridge is a fully managed event bus service that Amazon Web Services (AWS) provides. It enables you to create event-driven applications with ease by simplifying the process of handling events from various sources, including your own applications, AWS services, and third-party Software-as-a-Service (SaaS) applications.
Why EventBridge Integration Requires
- EventBridge Integration simplifies the process for nOps to automate tasks and processes within the client’s environment.
- Automatically execute events in accordance with nOps rules.
- Initiate automation to downsize underutilized instances.
- Facilitate the automatic, risk-free purchase or exchange of Reserved Instances (RIs) if RI utilization is suboptimal.
- Utilize the Resource Scheduler to seamlessly power on and off groups of different instances.
EventBridge Setup
Create an EventBridge
-
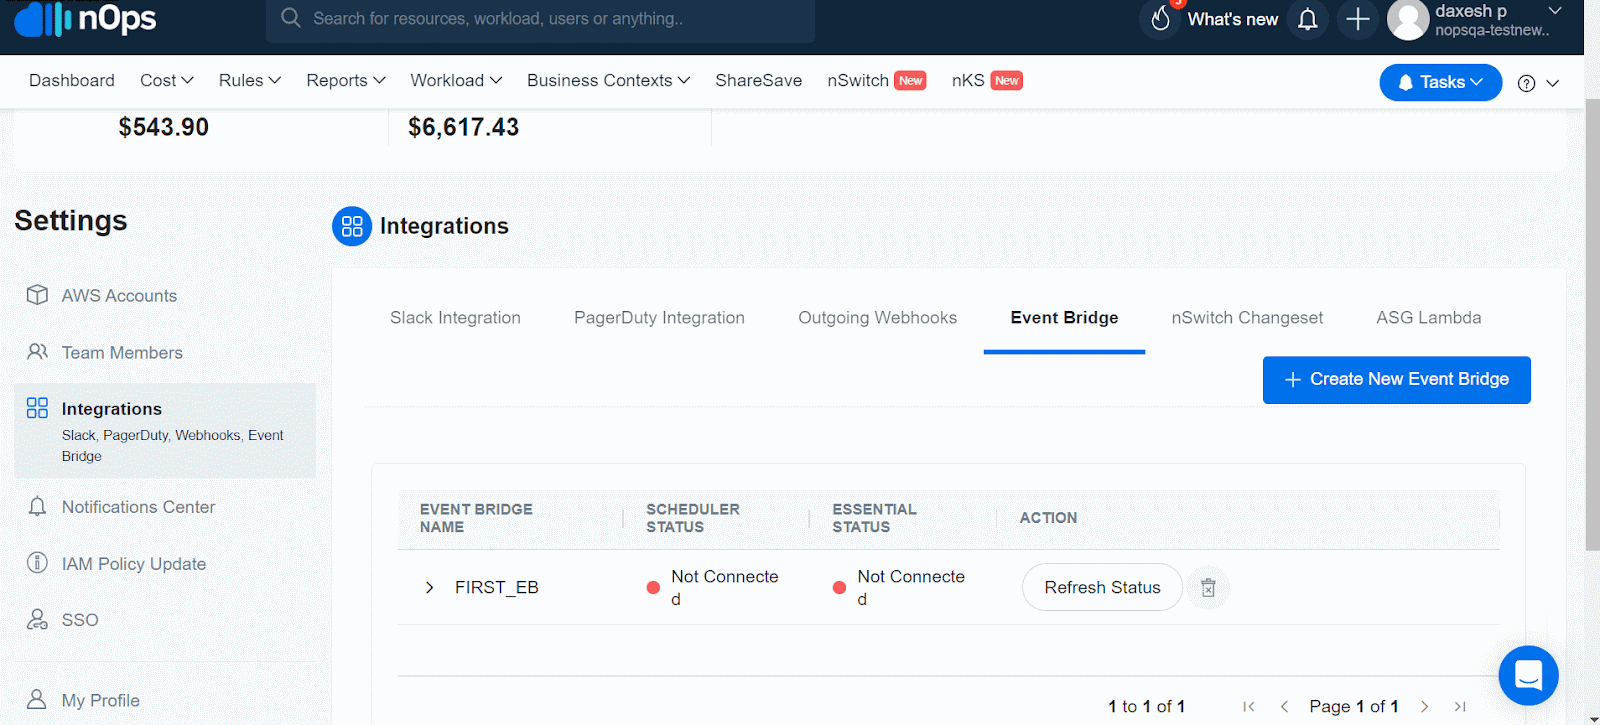
Within the nOps Platform, click on your login to the top right. Then select Organization settings > Integrations > Eventbridge.
-
In the Create EventBridge modal, enter the required details, and click Create.
- Give a unique name for the EventBridge, without space (such as Account-EB)
- Select the AWS account for which you want to configure the EventBridge. In the AWS accounts list, you will only see the accounts that have been configured for nOps.
- Select the region you want to deploy the EventBridge into.
Note: Please ensure your quota for EventBridge bus will allow additional incoming requests, or AWS will give a limit exceeded error while creating the Eventbridge. -
Once an EventBridge has been created in nOps, there will be a drop-down to access related details (account name , configuration statuses, the Launch Stack feature, Add key in KMS stack etc).


Configure EventBridge for nSwitch Scheduler
Please ensure that you are logged into the AWS account associated with the EventBridge you are configuring in the same browser before clicking on ‘Launch Stack’. Additionally, confirm that the account region matches the one specified during EventBridge creation.
-
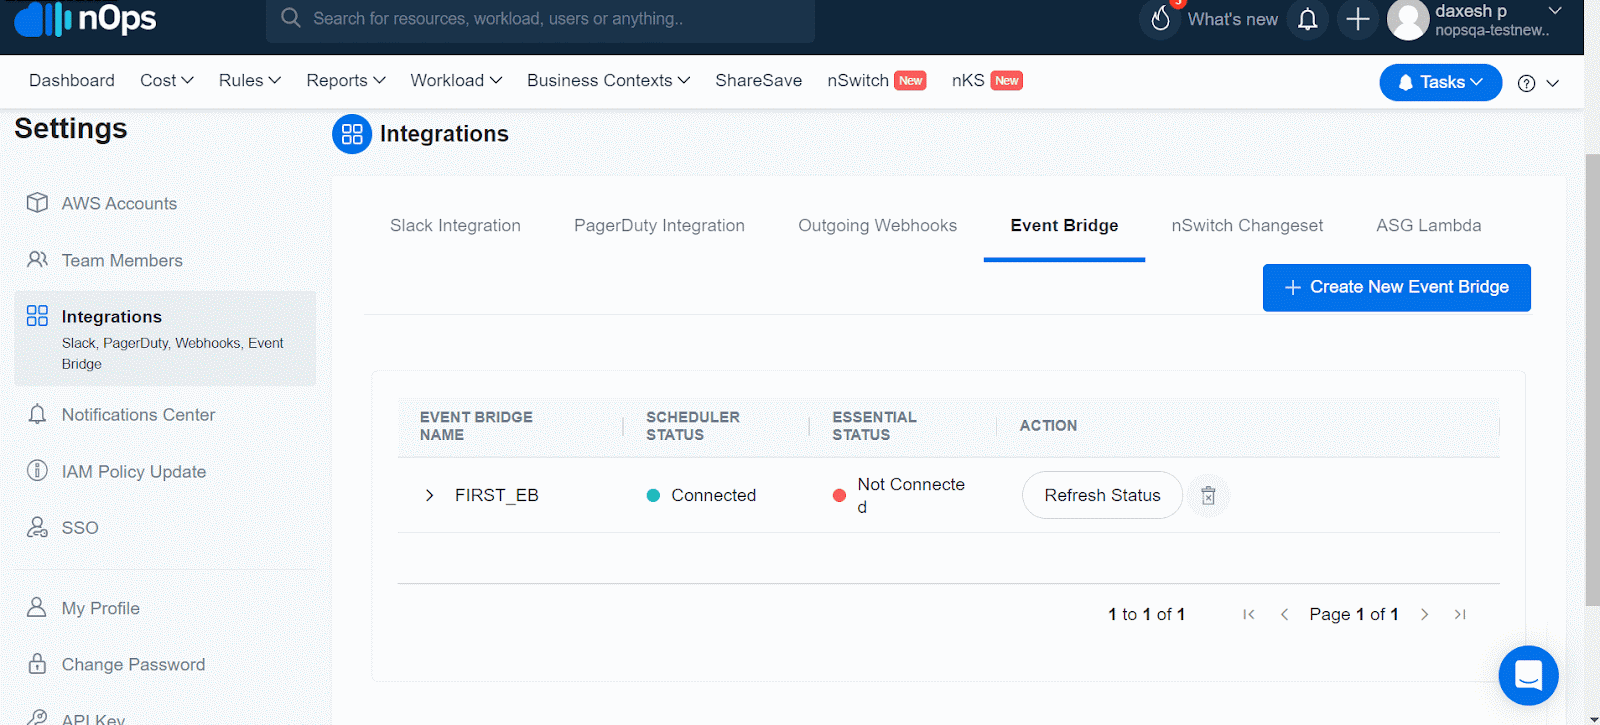
Within nOps, navigate to Organization Settings > Integrations > EventBridge.
- Expand the EventBridge you created.
- Click on “Launch Stack” specifically for the Scheduler.
- This action opens a new browser tab to AWS > CloudFormation > Stacks > Create Stack.
- Acknowledge by checking the box, then click Create Stack. Your EventBridge is now set up and configured.
**
Note: If you have a pop-up blocker enabled in your browser please be aware that it may prevent nOps from redirecting you to your AWS account for stack creation. -
Once Cloudformation has successfully completed, return to nOps and click Refresh Status.
Note: Connected status indicates that the EventBridge is ready for nswitch Scheduler.
Configure EventBridge for Essentials
-
Navigate to Organization Settings > Integrations > EventBridge.
- Expand the EventBridge you created.
- Click on “Launch Stack” specifically for the Essential.
- This action redirects you to AWS > CloudFormation > Stacks > Create Stack.
- Acknowledge by checking the box, and then click “Create Stack”. Your EventBridge is now set up and configured.
Note: Please ensure that you are logged into the AWS account associated with the EventBridge you created in the same browser before clicking on ‘Launch Stack’. Additionally, confirm that the account region matches the one specified during EventBridge creation.Important: If you have a pop-up blocker enabled in your browser please be aware that it may prevent nOps from redirecting you to your AWS account for stack creation. -
Once Cloud formation is completed successfully, Return to nOps and click on Refresh status to get the updated Essential status.
Note: Status connected indicates that this Eventbridge is ready for nswitch Essential now.

Users have the capability to create an EventBridge per AWS account. Once an EventBridge has been established for an AWS account, that specific account will no longer be selectable when making a new EventBridge.
To select that AWS account again in the Eventbridge creation user needs to remove the previous EventBridge and try again the whole process.
In nOps, the integration with EventBridge is intricately linked with the nOps Resource Scheduler. The Resource Scheduler comprises various layers, and one of these pivotal layers involves the integration and configuration with EventBridge.